

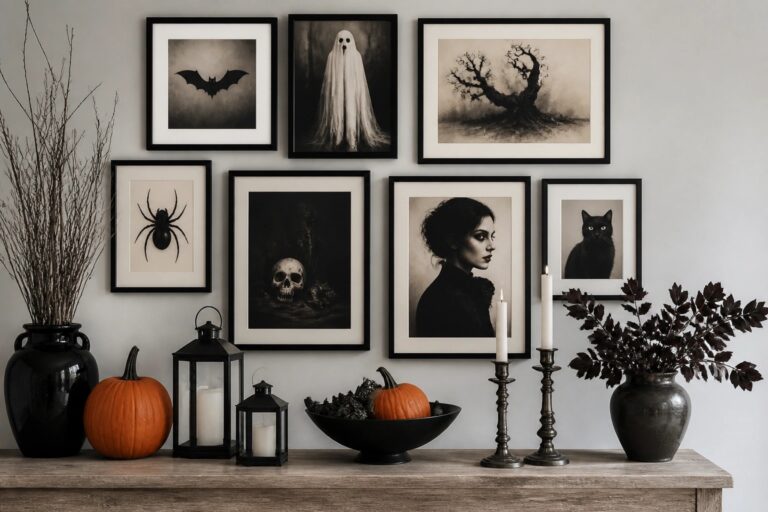
I have noticed that swapping out wall art gives a room an immediate Halloween feel without touching the rest of the furniture.
Larger pieces like printed silhouettes or hanging lanterns stand out more than smaller accents scattered on shelves.
My entryway always feels more seasonal once I replace the usual prints with something that features bats or pumpkins.
Many people try to decorate every surface but I prefer keeping the changes focused on the walls so the space stays livable.
A single bold wall display can shift the mood of an entire room faster than I expected.
Create A Gallery Wall With Halloween Prints
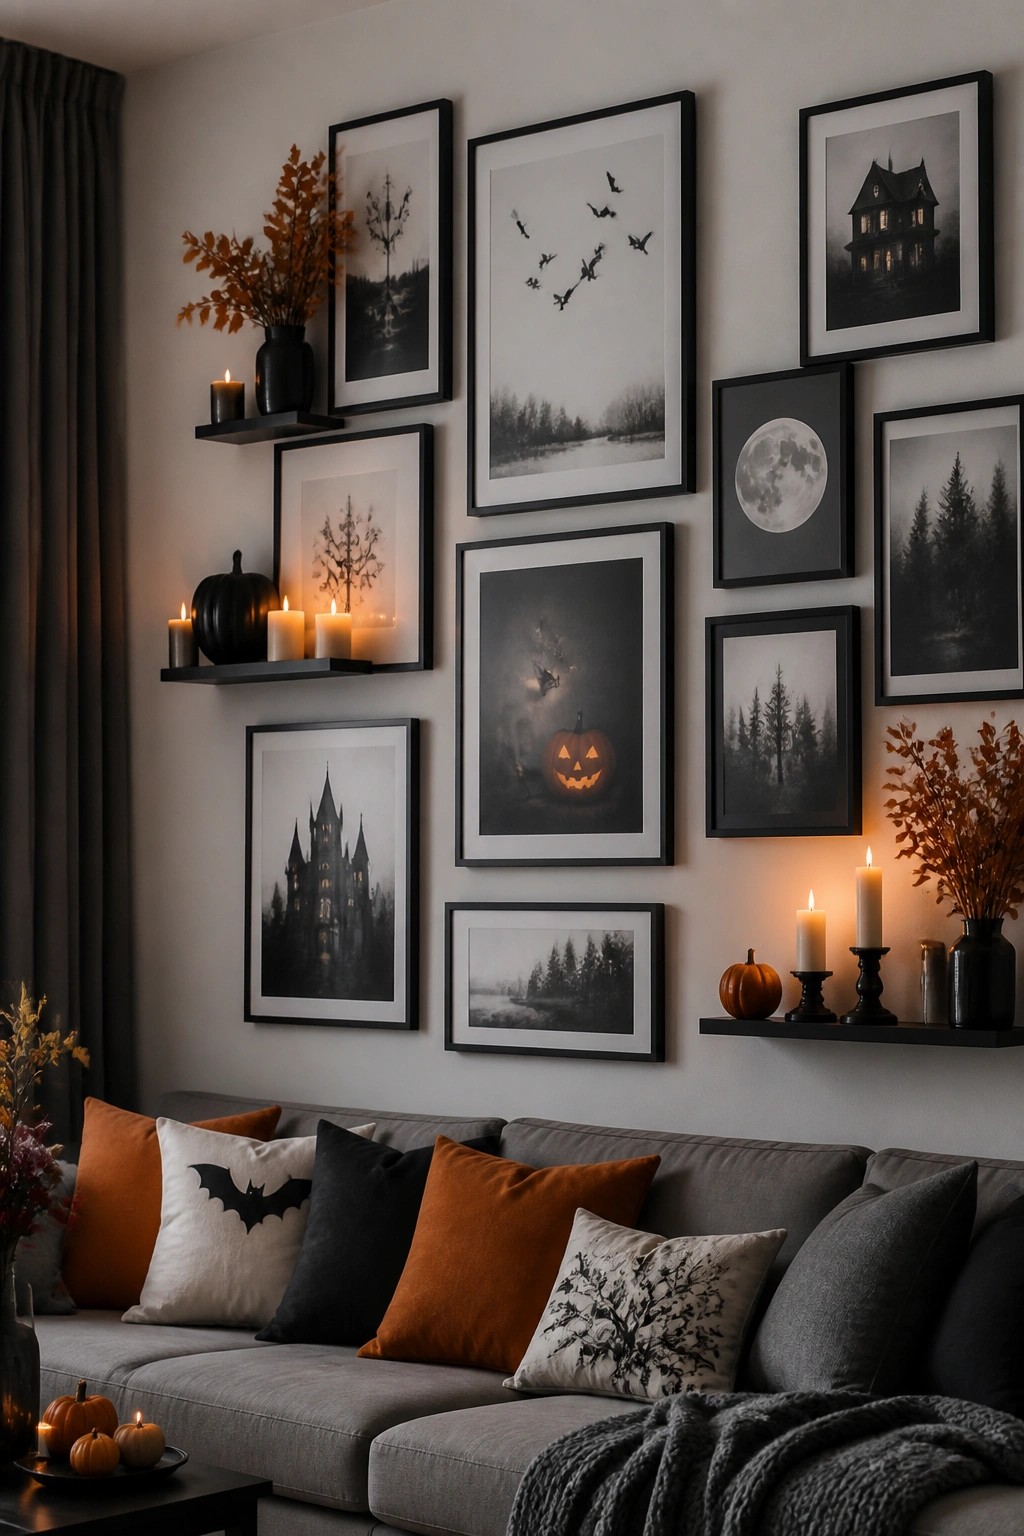
One of the simplest ways to change the feel of a living room is to fill a wall with framed prints that feature classic Halloween imagery. Black and white shots of flying bats, a glowing jack o lantern, and a dark haunted house stand out clearly against a light wall and give the space an obvious seasonal update without needing bright colors or lots of extra objects.
This idea works well because the prints can stay in the same frames you already use. Look for moody images that share a similar tone, then group them together above a sofa or console. A mix of five to eight pieces is usually enough to make the wall feel intentional while keeping the rest of the room calm.
Recommended Products

Package includes: comes with 6 pieces paper lanterns in total, each lantern is approx. 30 x 28 cm/ 11.8 x 11 inches, enough for Halloween spooky home decoration, party and festival decor

Product Size: The Halloween peel and stick wallpaper measures 118.1"x17.7", making it ideal for large walls or small creative projects. It can be trimmed to fit corners, furniture, or shelves easily.

HALLOWEEN PRINTED GLASS DESIGN – Features spooky Halloween designs printed directly on the glass panels, giving each lantern a festive and eerie look for seasonal decorating.
Style Dark Branches Around A Window Frame
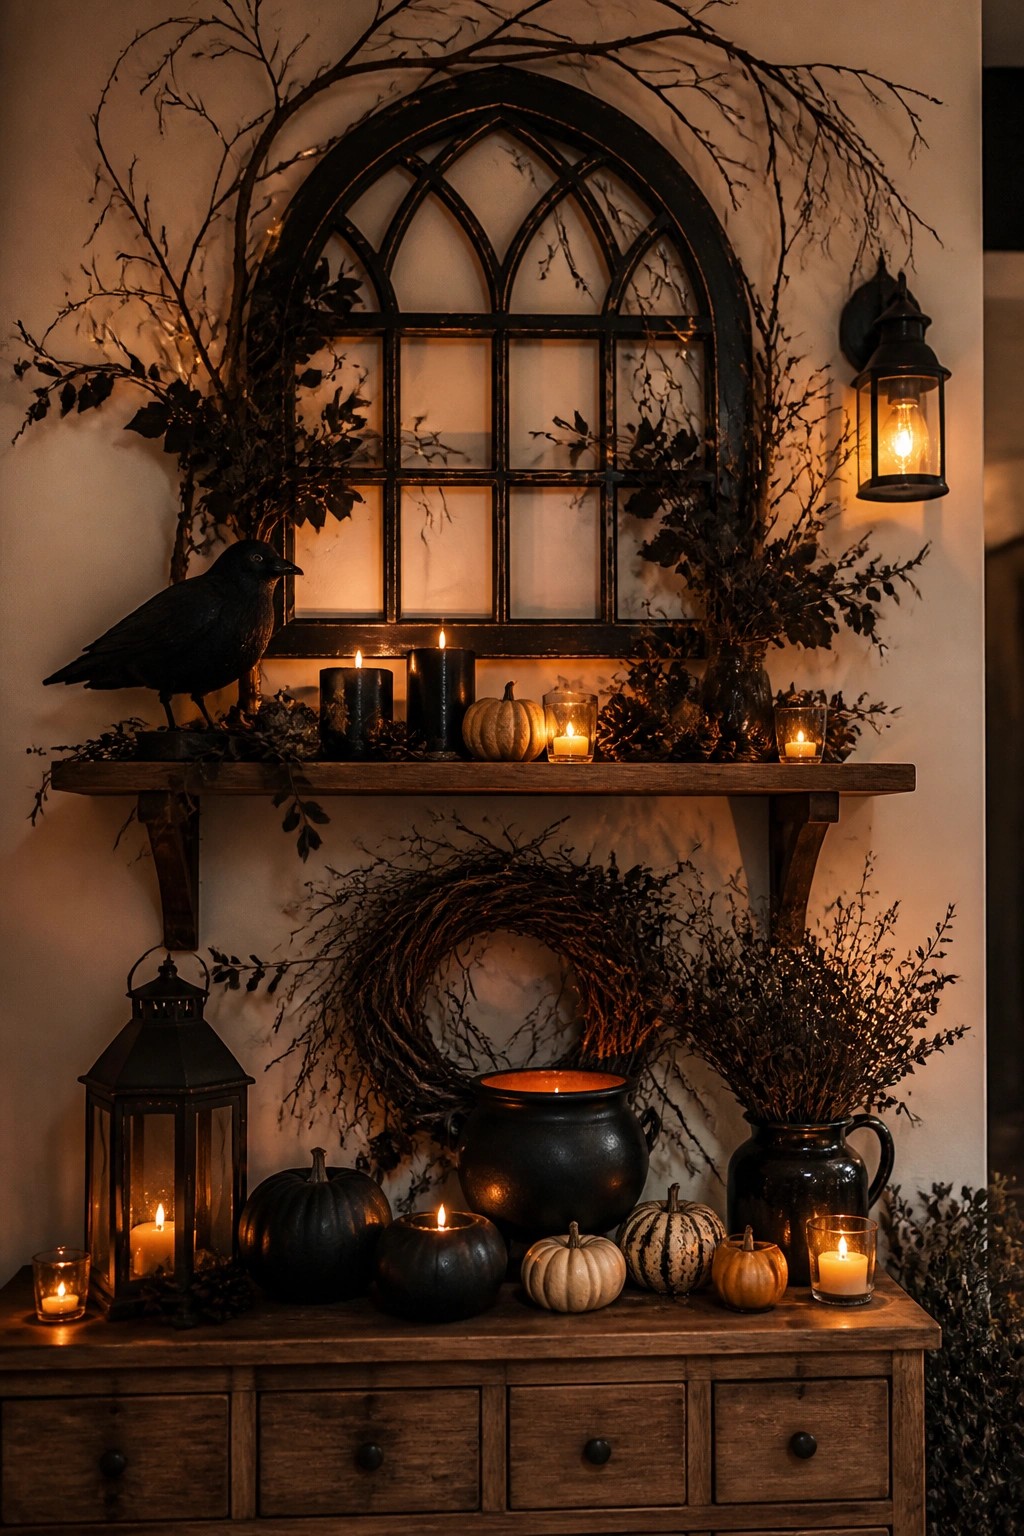
One of the easiest ways to make a wall feel Halloween-ready is to work with what is already there. Here the arched window becomes the base, and dark branches are simply tucked around the edges with a crow perched on the shelf below. The branches add height and shape without covering the glass, so the whole setup still feels light during the day and dramatic at night.
This idea works best in an entryway or living room where you already have a large window or mirror. Start with flexible branches from the yard or craft store, then add just one or two darker accents like the crow. Keep the rest of the wall plain so the branches stand out instead of competing with other decorations.
Hang A Witch Hat On The Wall
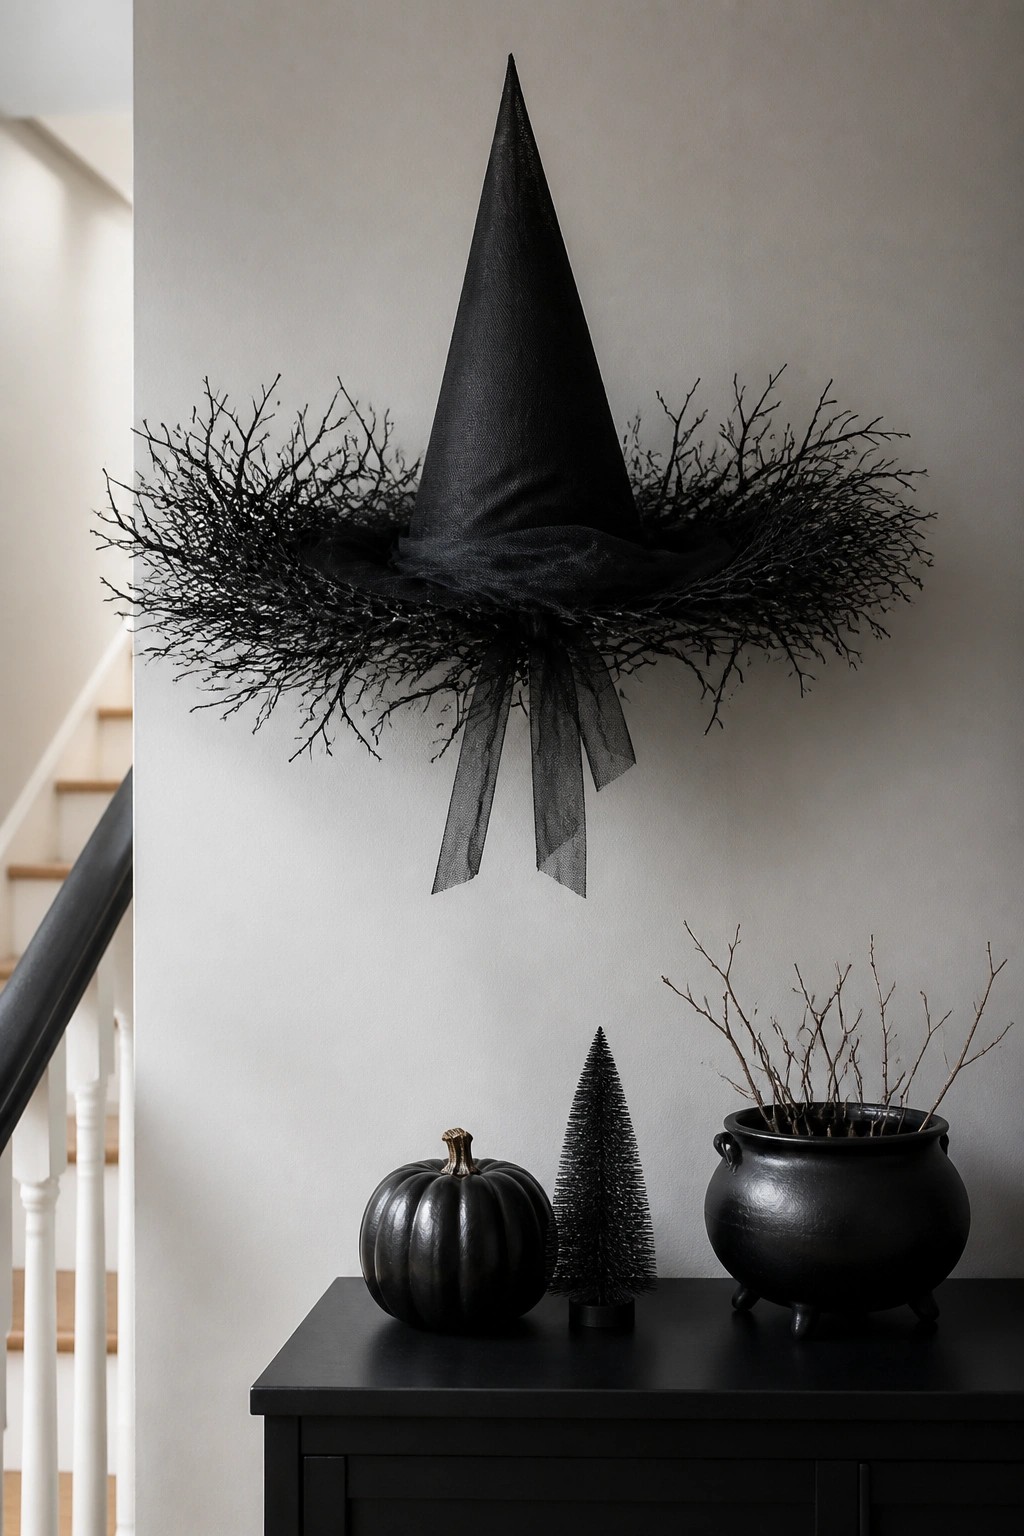
A witch hat makes a strong wall statement when it is the clear center of the display. Pairing it with dark branches creates an instant Halloween focal point that reads from across the room without needing much else.
Hang the hat at eye level and build a simple wreath around it using flexible black branches or twigs. Add a sheer ribbon if you want a bit of movement. This works well in an entry or along a hallway where the wall is otherwise plain.
Recommended Products

VERSATILE DISPLAY : You Can Use This 6x4 Inches Frame in Various Ways Portrait/Landscape You can be Used to Place it on the Tabletop Display or Desk. Photos can be Changed Easily . it's Great for your Desk, Dressing Table, Countertop, and More.

Premium Handmade Materials - Crafted from ethically sourced bone inlay and durable MDF pine wood, each frame is hand-carved and polished by artisans. The 0.9 -inch wide border showcases a timeless black and white chevron design that complements modern, boho, or vintage interiors.

Create A Gallery Wall With Portraits And Skulls
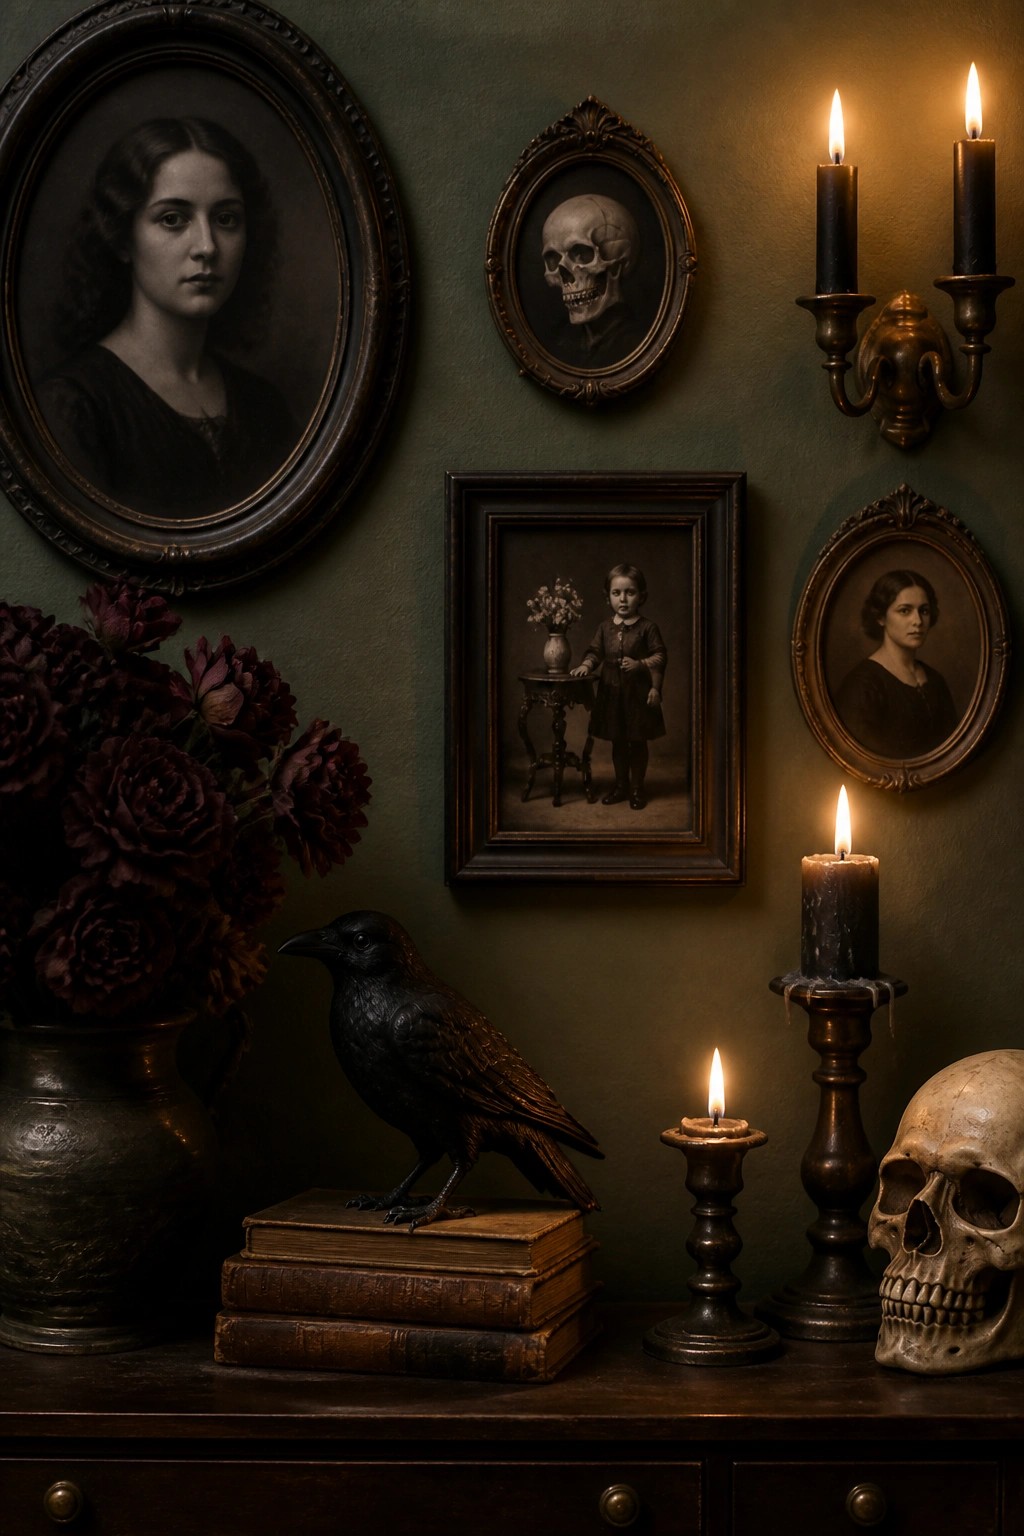
A simple way to change a wall for Halloween is to group framed portraits with skull images. The mix of old photos and skull prints gives the wall a collected, slightly eerie look without needing a lot of extra pieces. It works because the frames stay the same while the subjects shift from normal to unsettling.
Try this on any empty wall space by swapping in a few skull prints or small skull paintings among regular portraits you already own. Keep the number of frames modest so the skulls stand out but do not take over the whole wall.
Display A Skull In A Macrame Wall Hanging
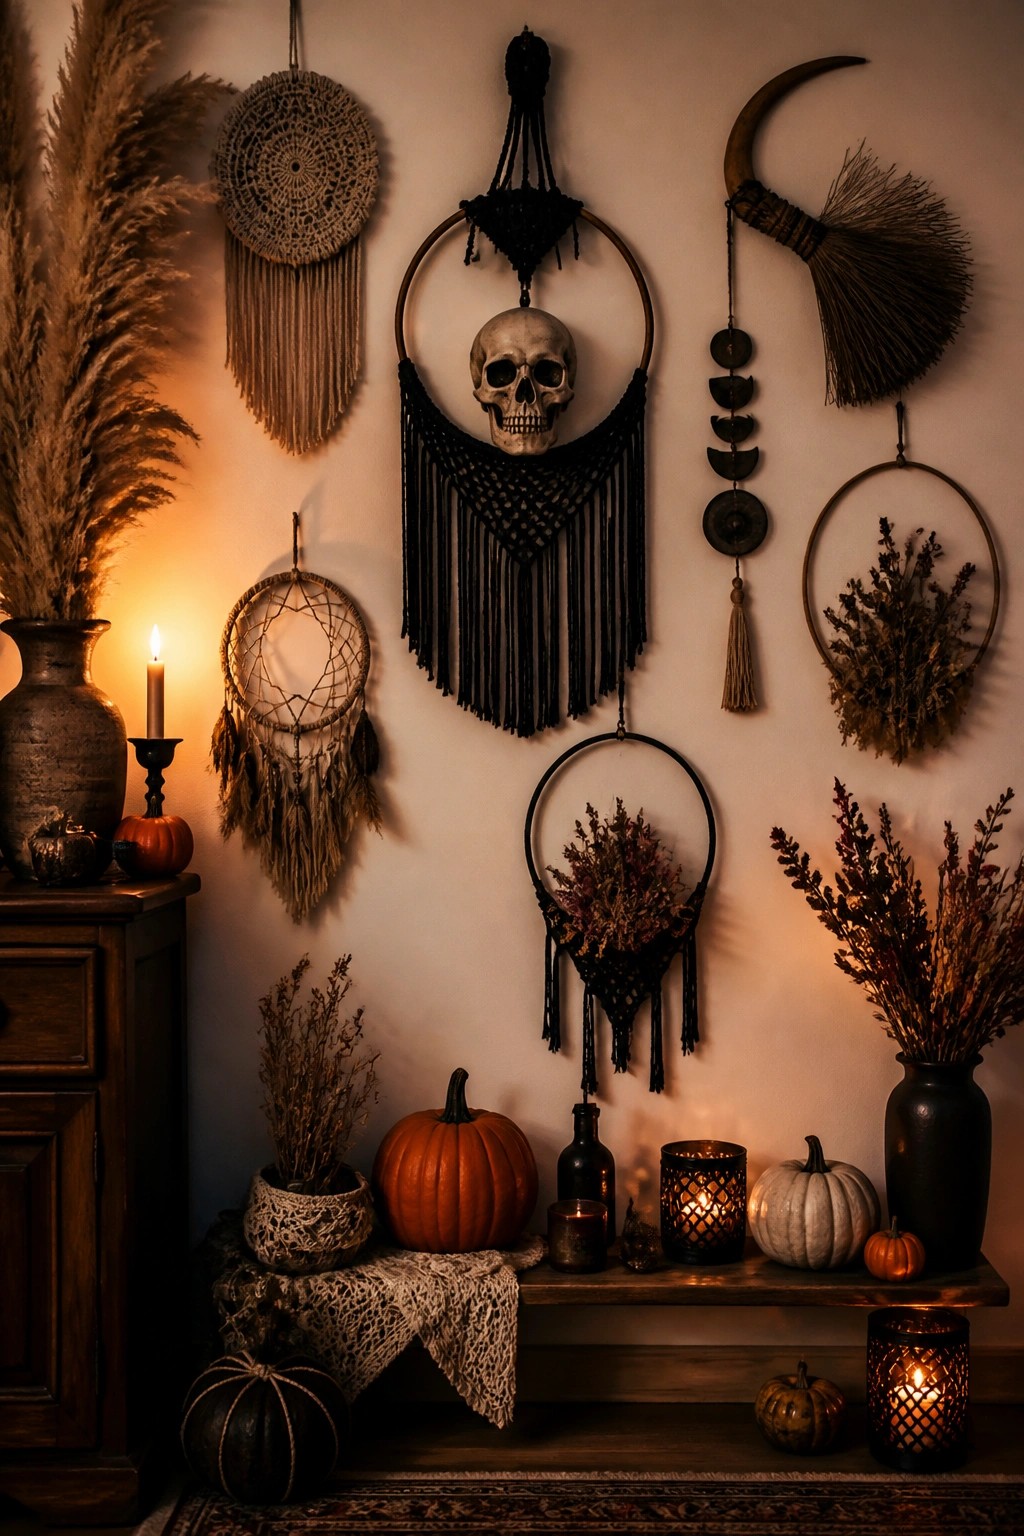
A skull placed inside a large black macrame hoop gives the wall an instant Halloween focus. The dark fringe and simple circular frame keep the look clean while making the skull the clear center point.
Hang one main piece like this above a console or bench, then add a few smaller hoops or dreamcatchers around it. Keep the rest of the wall light so the skull and macrame stand out without crowding the space.
Fill A Wall With Bat Prints And Mirrors
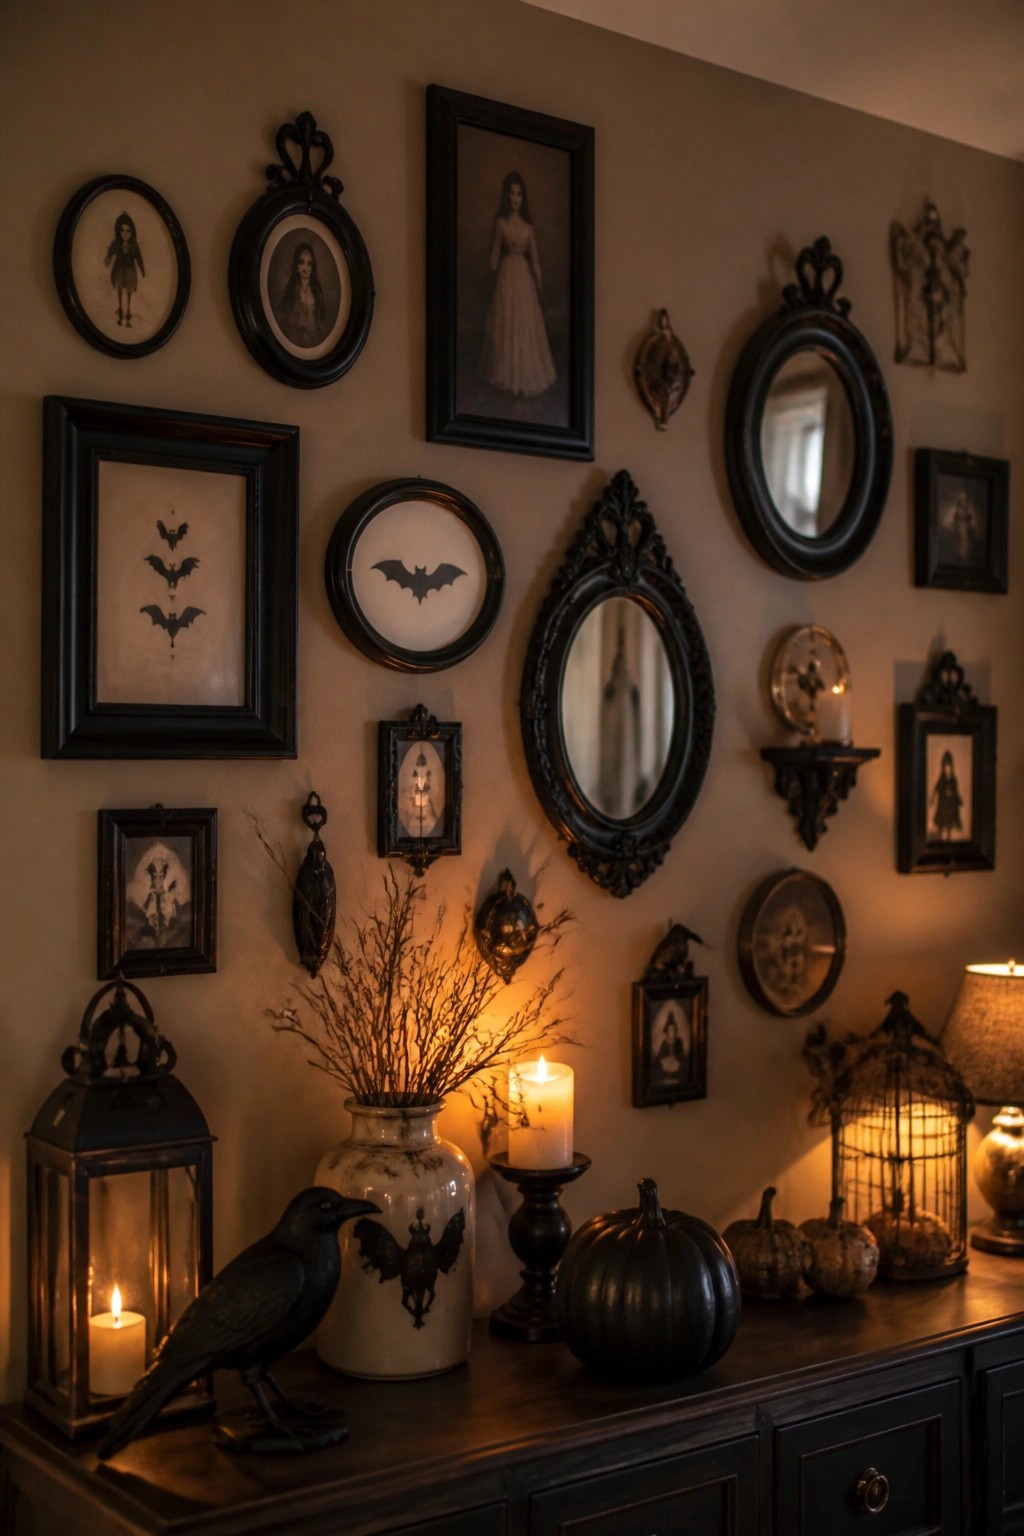
A simple way to change the feel of a space is to group several bat prints and dark framed silhouettes together on one wall. The mix of oval, round, and rectangular frames keeps the arrangement from looking too planned while the repeated bat motif makes the Halloween theme clear right away.
Start with three or four bat prints in different sizes and fill in the gaps with small mirrors or vintage style portraits. Place the largest piece near the center and let the rest spread out naturally. This approach works well above a console or along an entry wall and only needs a handful of pieces to feel complete.
Hang A Skull Wreath On The Mantel Wall
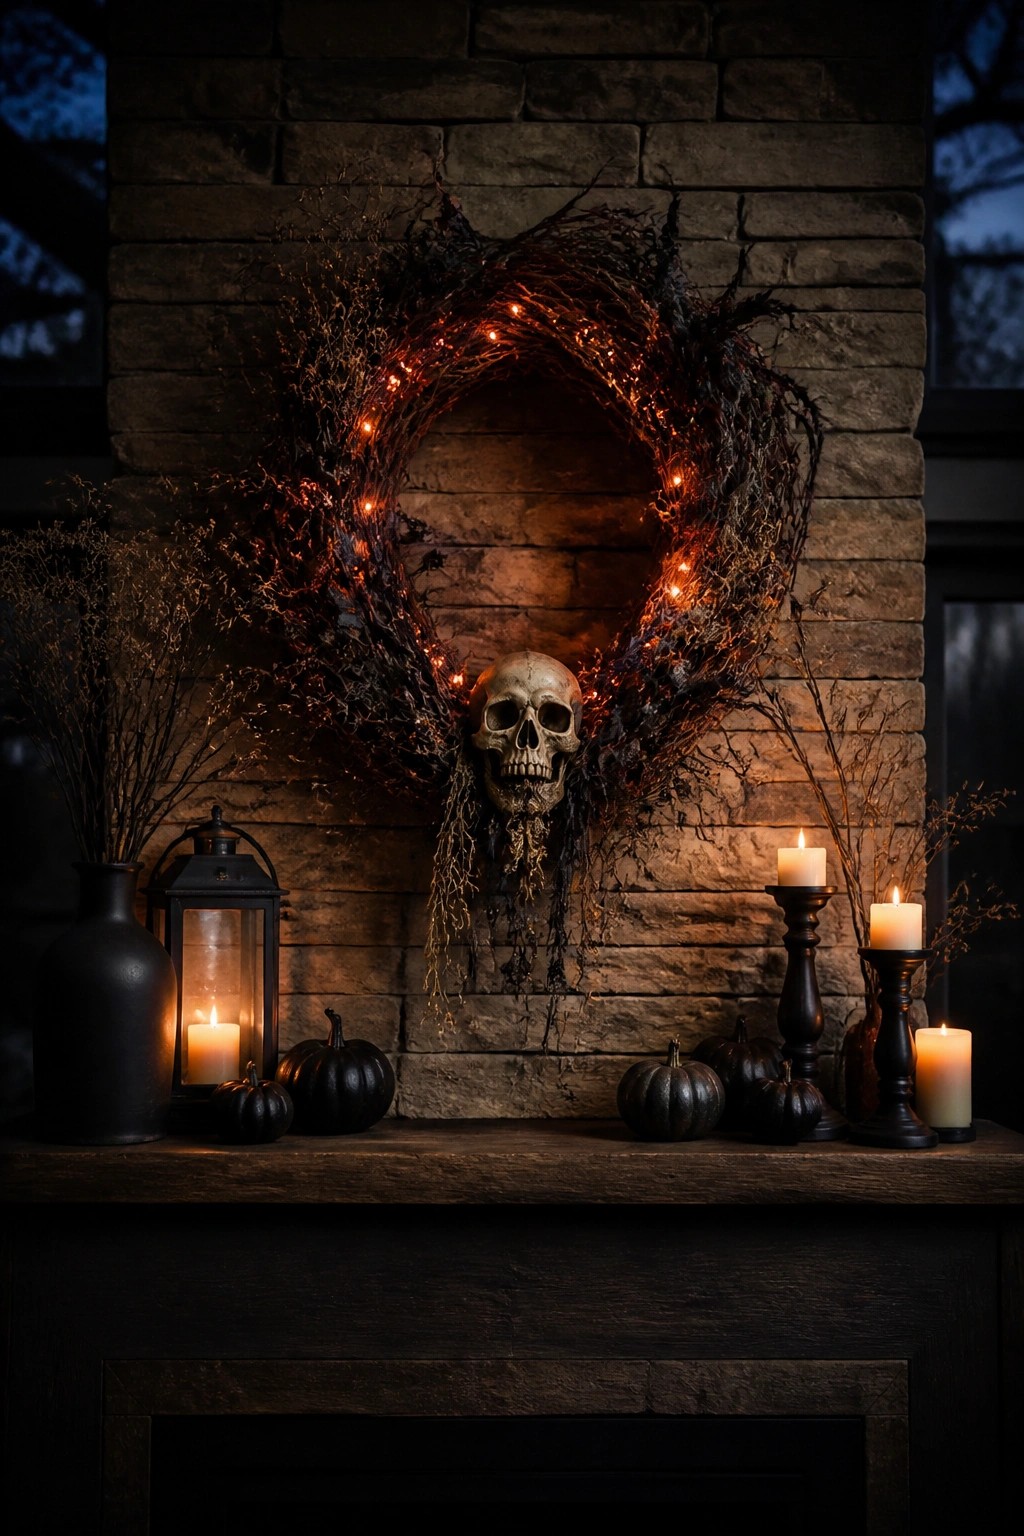
A skull centered in a dark twig wreath makes a strong Halloween statement on any mantel. The orange string lights woven through the branches keep the look from feeling flat while the skull gives it an unmistakable Halloween focus.
Hang the wreath so the skull sits right at eye level above the mantel. Add a few black pumpkins and simple candle holders on the shelf itself. Keep everything else minimal so the wreath stays the main feature.
Style Skulls Across Wall Shelves
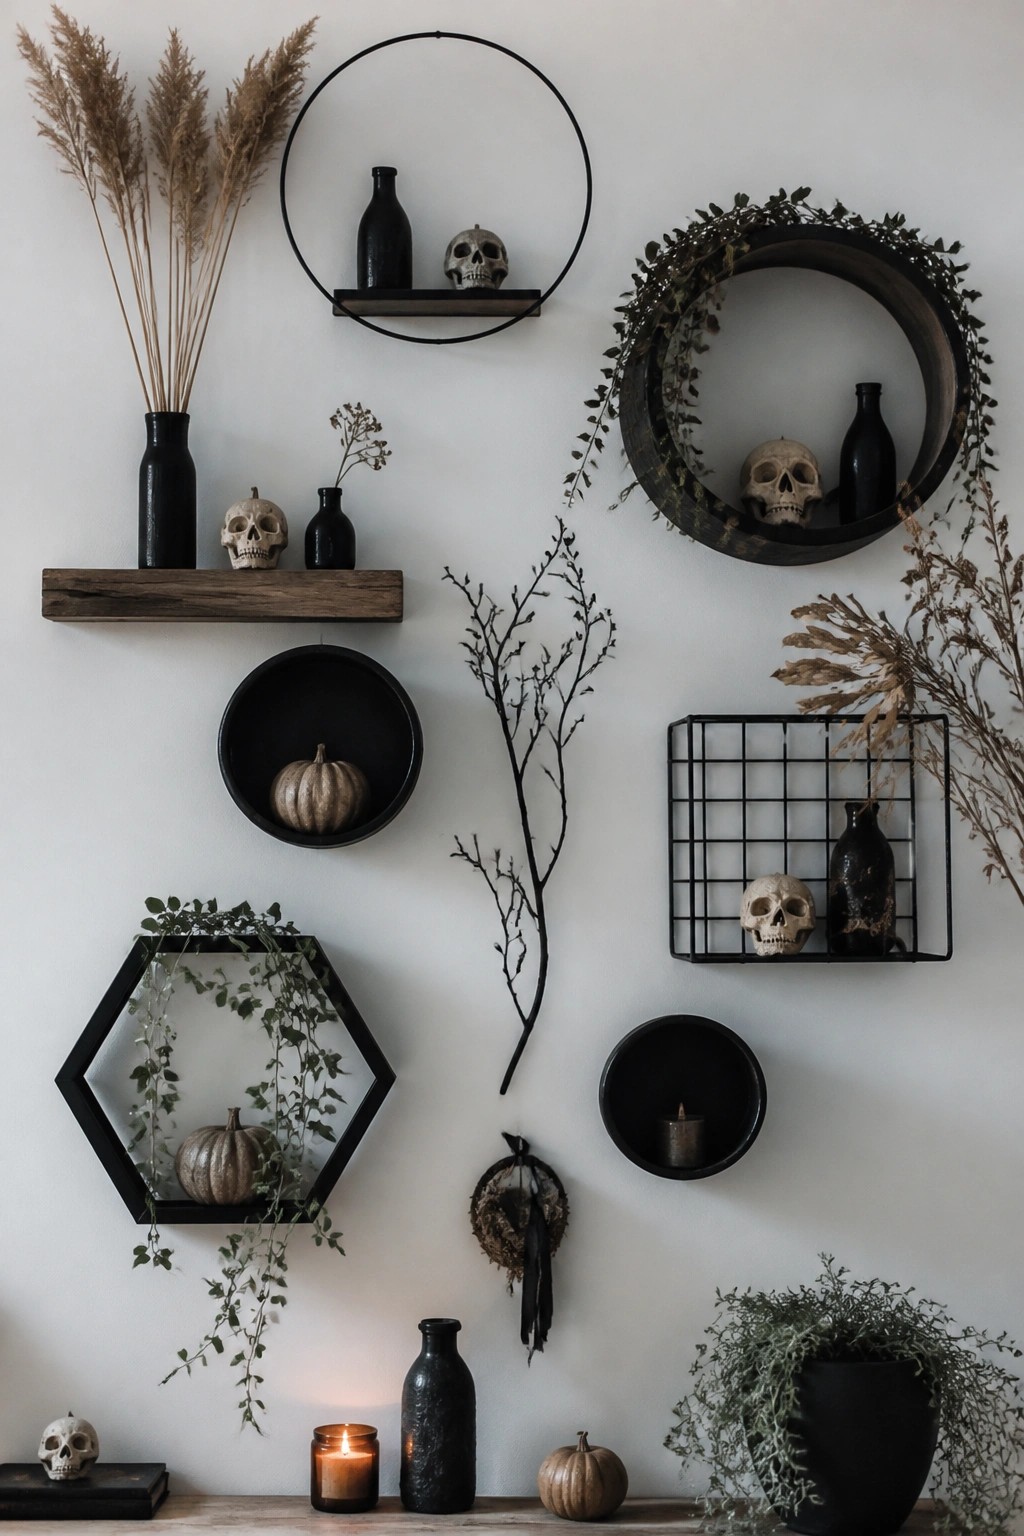
Skulls placed inside round and hexagonal wall shelves give the wall an instant Halloween focus without needing much else. The dark frames and repeated skull shapes stand out clearly against a light wall, and the few black bottles and small pumpkins keep the look tied together.
Pick two or three different shelf shapes and add one skull to each. Fill in with a bottle or a small pumpkin where space allows, then stop. This setup works best on a large blank wall where the shelves can sit at different heights.
Create A Bold Graphic Wall Banner
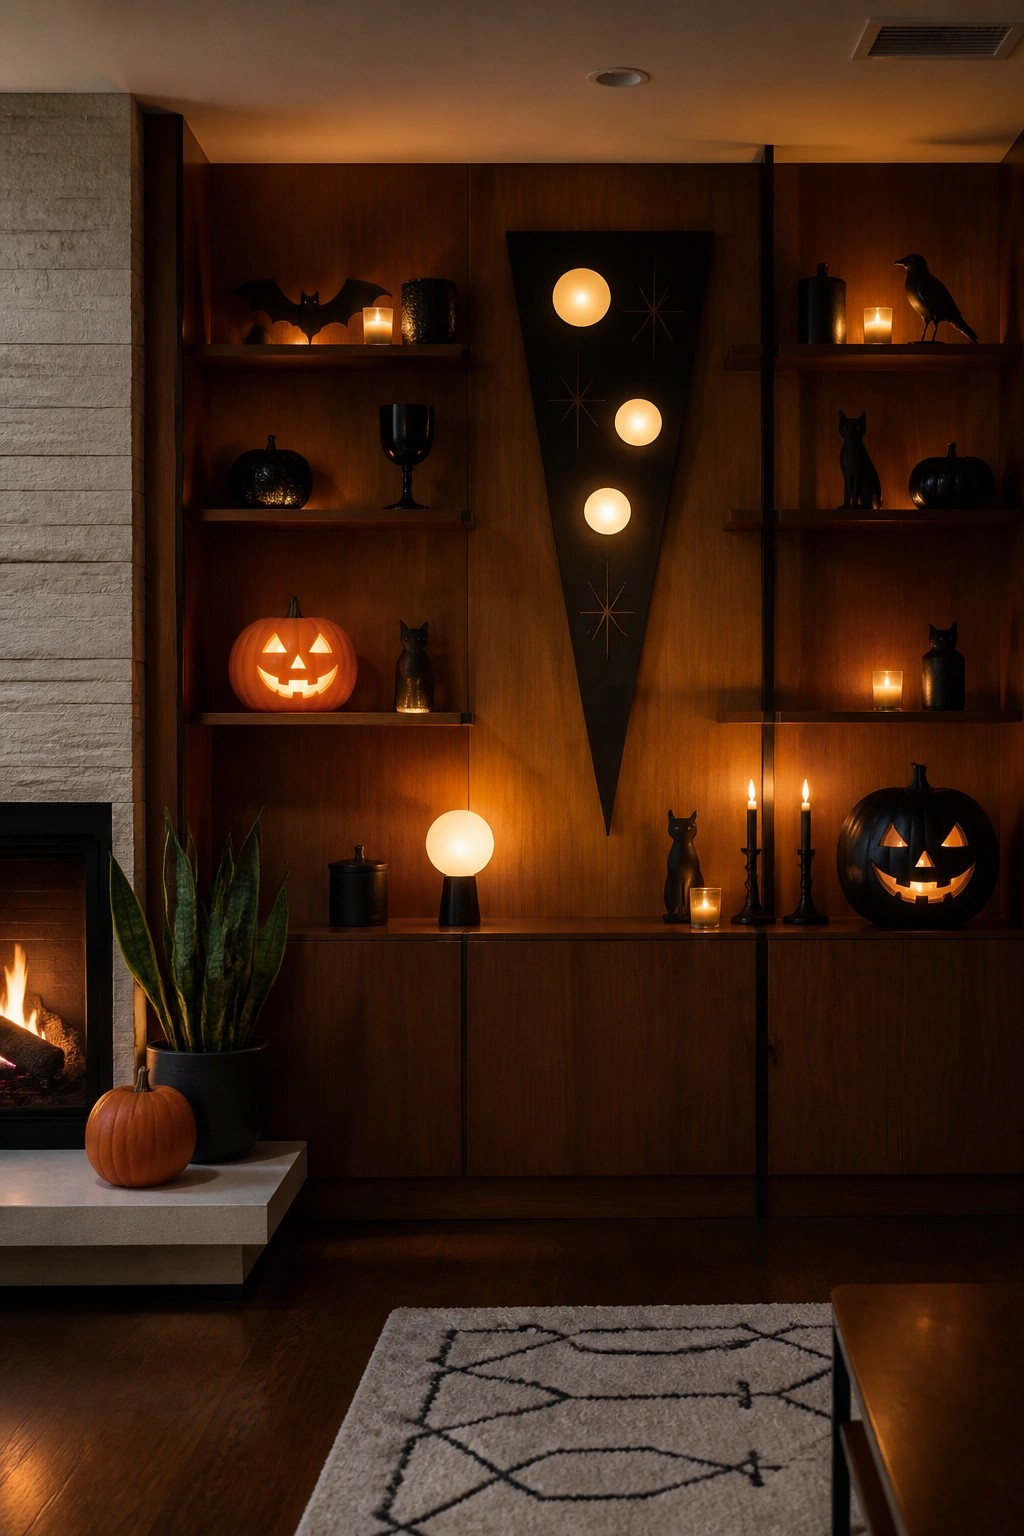
A large black triangular banner covered in glowing orbs and starbursts makes an instant Halloween statement when hung above a console or built-in shelves. It pulls the eye immediately and gives the whole wall a clear focal point without needing dozens of small pieces.
Hang one oversized banner first, then add a few matching accents like bats or cats on nearby shelves to keep the look balanced. This approach works well in living rooms where you want one strong wall element rather than scattered decorations everywhere.
Create A Halloween Mantel Display
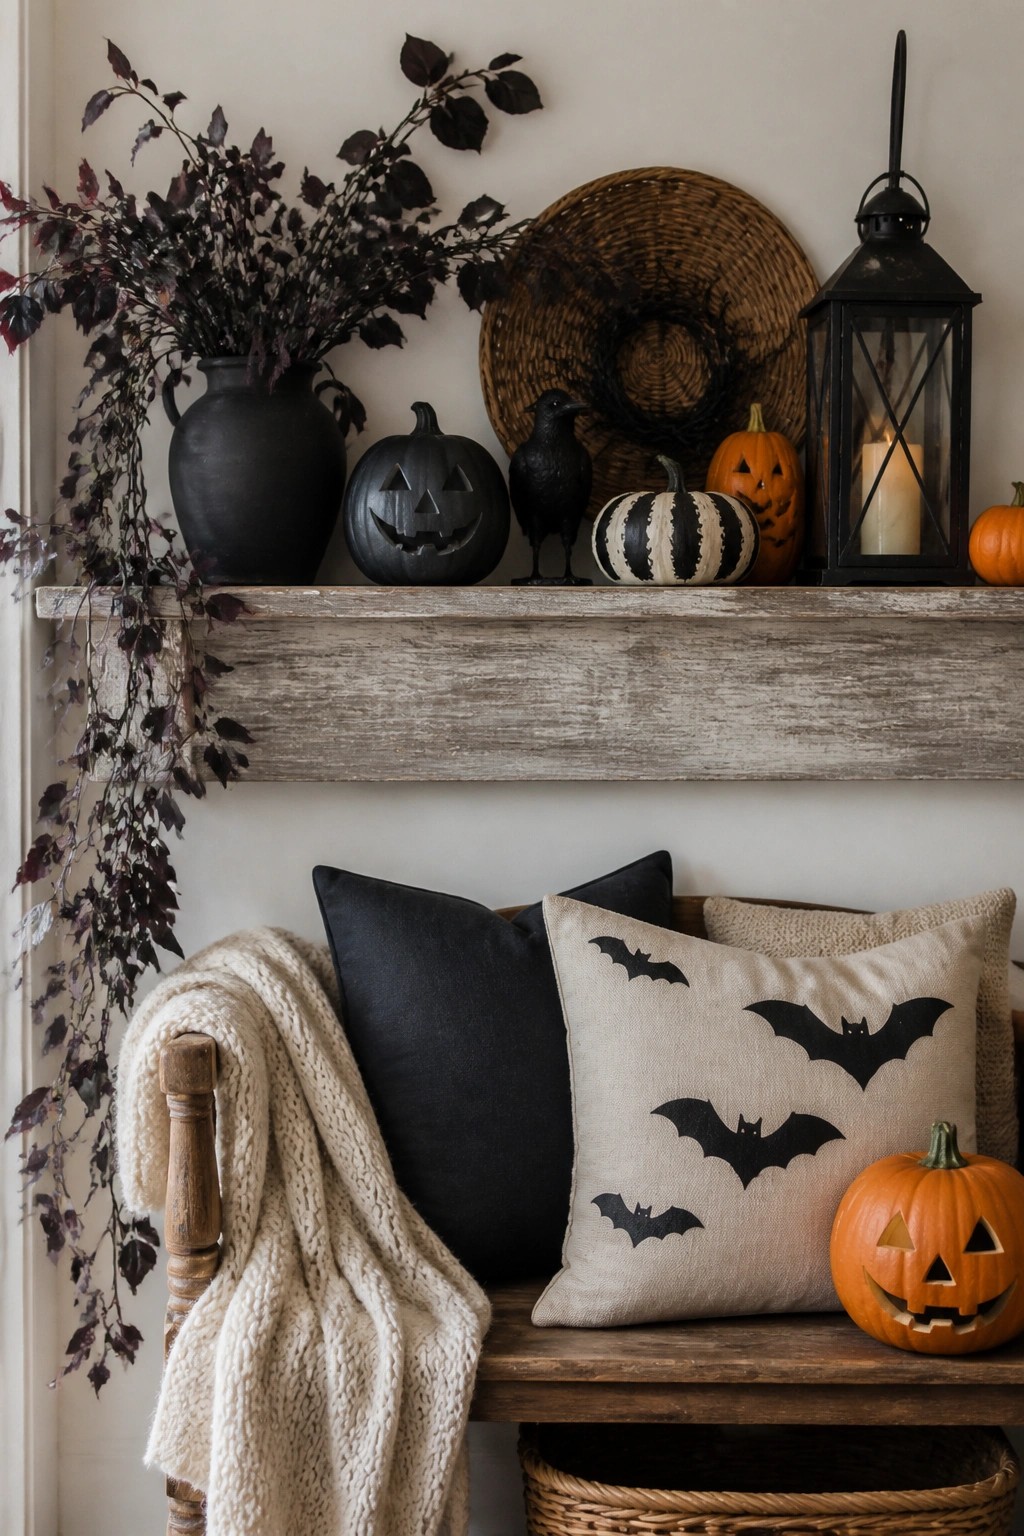
A mantel works well as a Halloween focal point because it sits at eye level and lets you group carved pumpkins with a few darker accents. The black jack-o’-lanterns and crow figure here stand out against the lighter wall and give the space an unmistakable seasonal look without covering the entire surface.
Place two or three carved pumpkins of different sizes along the mantel, add one or two dark figurines like a crow or raven, and tuck a lantern at one end. Keep the rest of the shelf fairly open so the shapes read clearly from across the room. The same approach works above a bench or console if you do not have a fireplace.
Create A Gallery Wall Of Halloween Prints
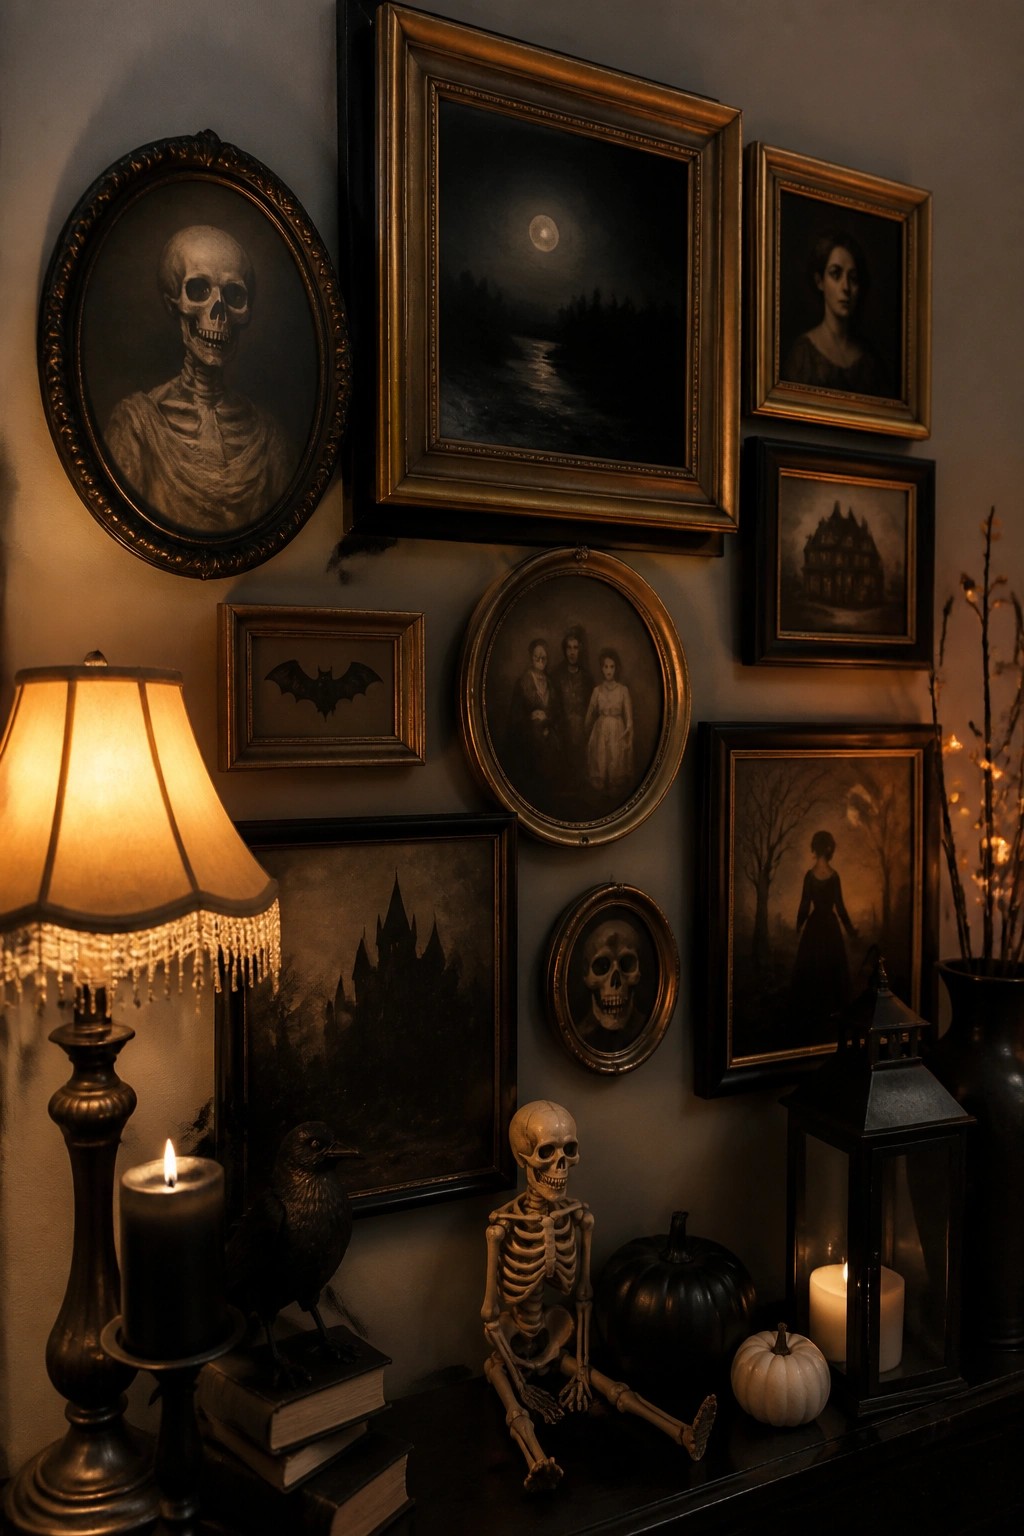
One easy way to change the mood in a room is to group framed Halloween prints together on one wall. Skeleton portraits, a bat silhouette, and dark landscape scenes work especially well because they read as intentional decor instead of random seasonal accents.
Start with three or four larger frames and add smaller ones around them until the arrangement feels full. Keep the surrounding surface simple so the prints stay the main focus.
Style A Dark Halloween Mantel With Black Branches
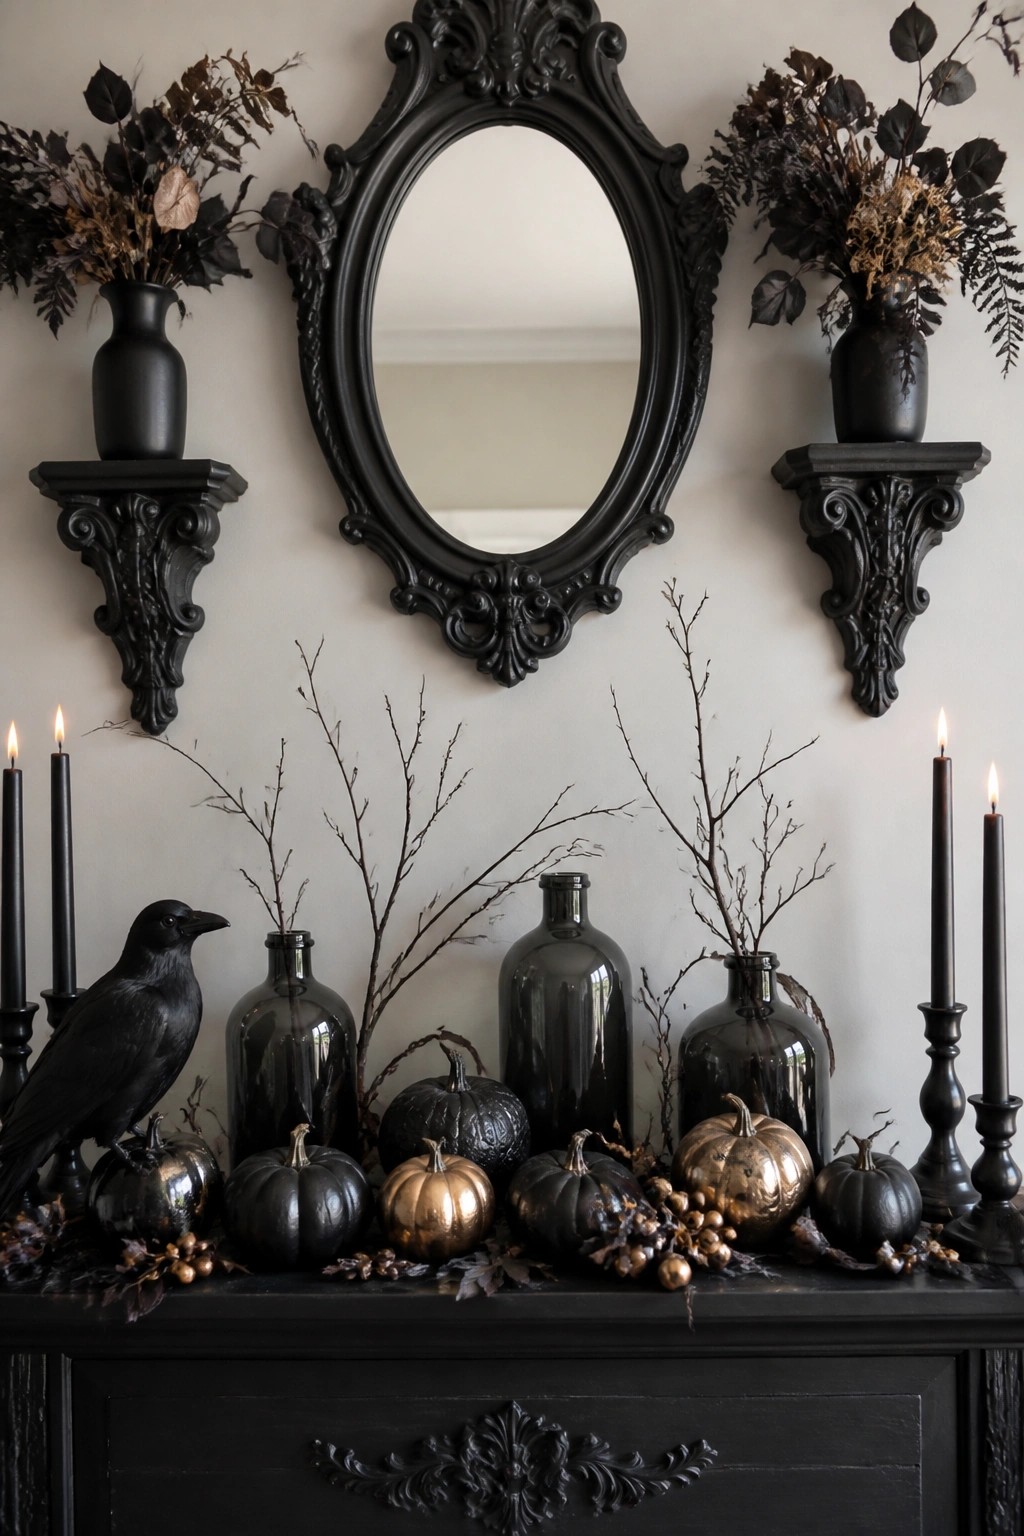
A large mirror becomes the anchor for a Halloween mantel when you add bare black branches on both sides. The branches create height and a stark silhouette that reads as spooky without needing many extra pieces. A single black crow perched among the pumpkins pulls the eye and makes the whole setup feel intentional.
Place the mirror first, then add two or three tall glass bottles filled with thin branches. Scatter a few dark or metallic pumpkins along the mantel and tuck in a crow or two for contrast. This works best in an entry or living room where the wall can stay simple and let the branches stand out.
Recommended Products


Design: Our Halloween Floral Picks feature a classic Gothic-style design, combining pumpkins and candies in a striking orange-and-black color scheme. Whether you use them to decorate your living room, bedroom, dining table, or windowsill, they effortlessly create a mystical Halloween atmosphere
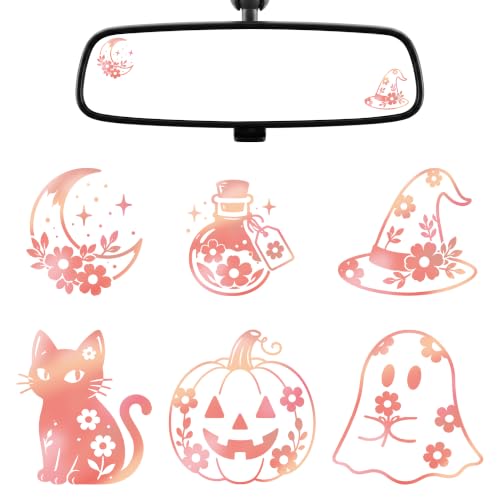
6 Boho Halloween Designs: Includes 6 rearview mirror stickers featuring a floral witch hat, smiling pumpkin, cat, ghost, potion bottle and crescent moon, combining spooky icons with flowers and soft tones for distinctive boho Halloween car decor
Create A Skeleton Mantel Display
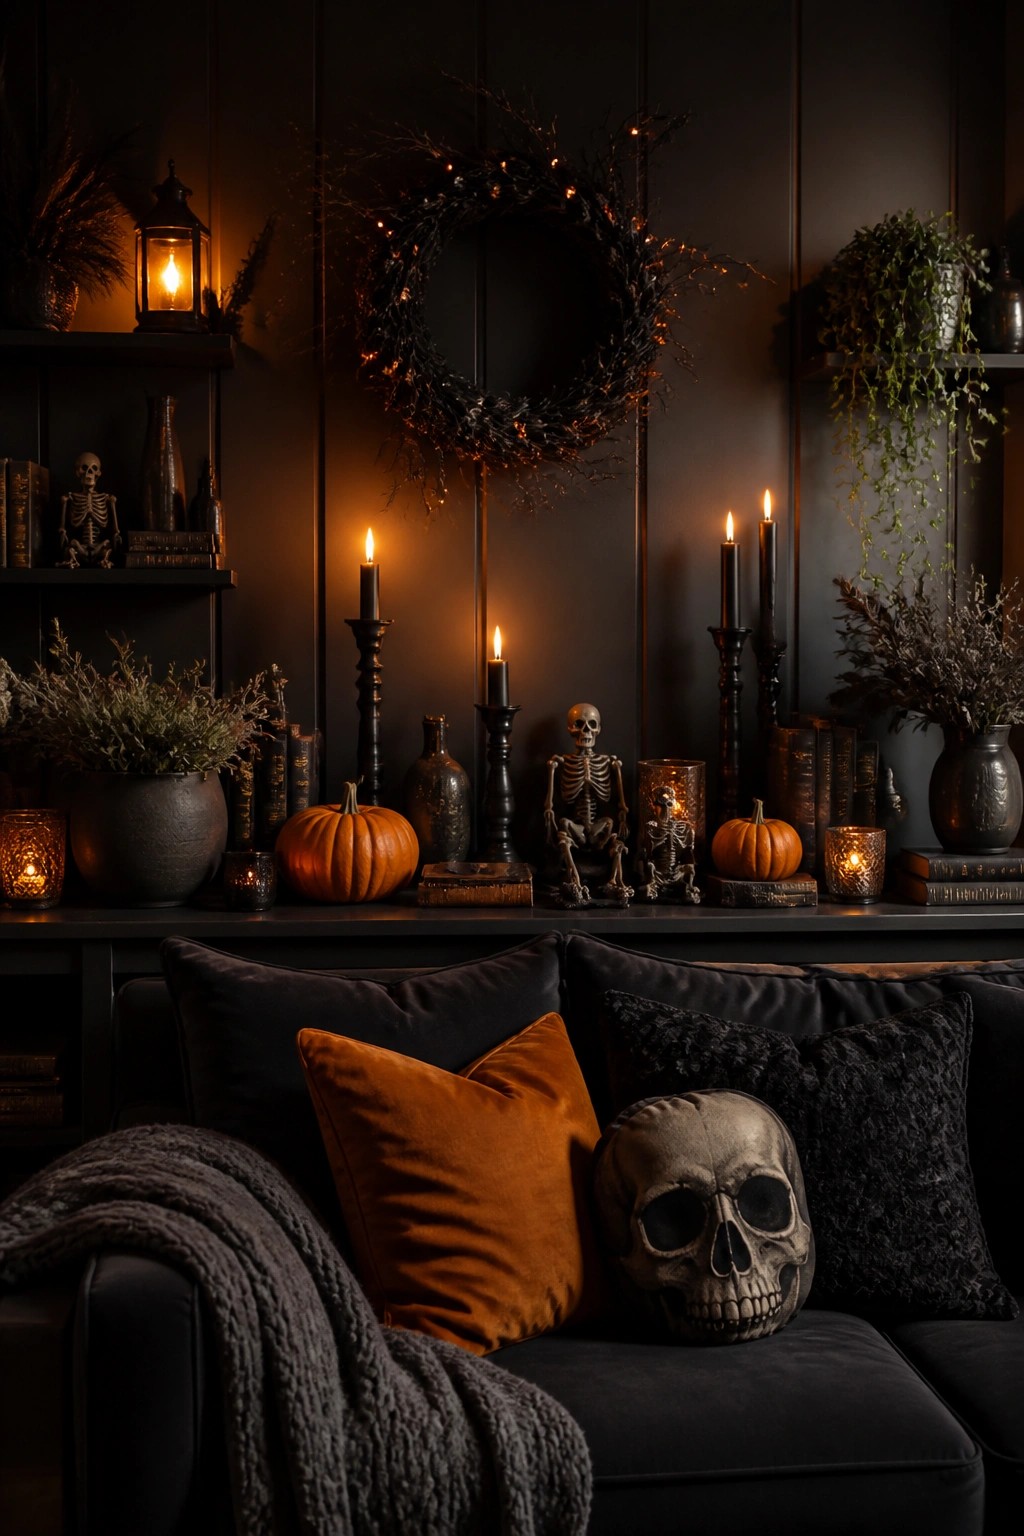
Place a few small skeleton figures along a long mantel or shelf against a dark wall. The bones stand out clearly and turn that one section of the wall into the main Halloween feature without needing much else.
Start with two or three skeletons in sitting or standing poses, then add a couple of tall black candles and a small pumpkin or two. Keep the rest of the shelf fairly empty so the skeletons remain the focus. This setup works well in a living room and can be put up or taken down quickly.
Style Black Crows On A Wall Shelf
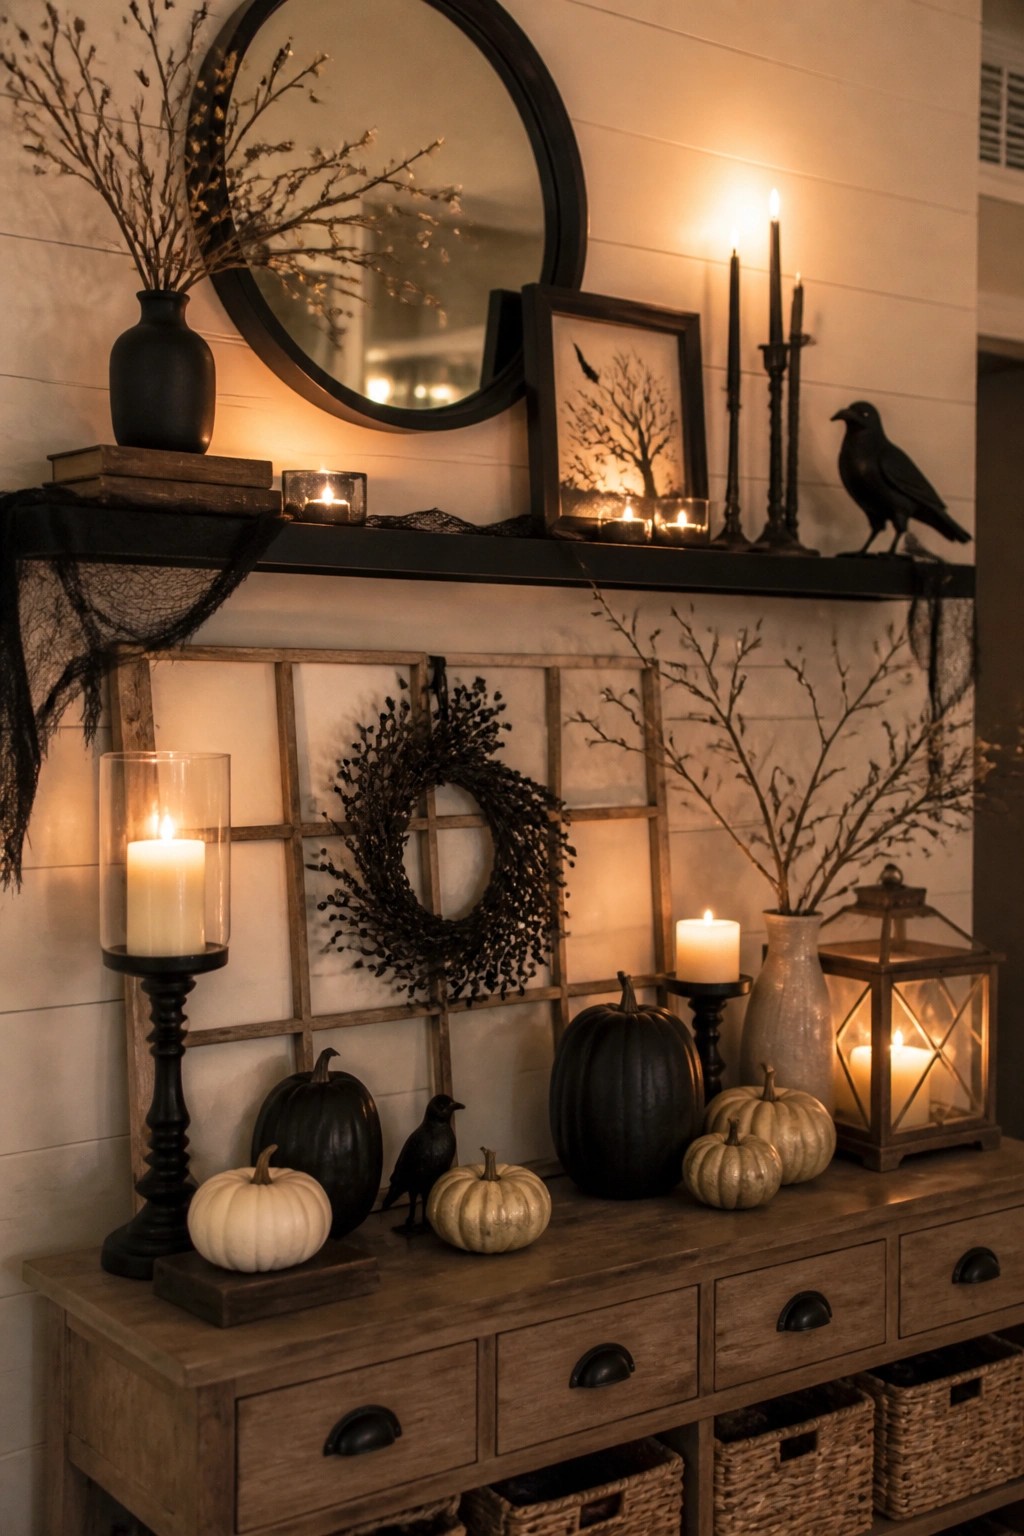
Black crows make a strong but simple Halloween accent when placed along a wall shelf. They stand out against lighter walls and pair easily with candles, a few black pumpkins, and a dark wreath on a nearby panel. The look stays neutral while still reading as Halloween instead of plain fall.
Try grouping two or three crows on the shelf and keep the rest of the display low key. One framed piece of art and a few candles are usually enough to support the theme without crowding the space. This setup works well in an entry or along any long wall where you want a clear seasonal touch that is easy to swap out later.
Style A Skeleton Gallery Wall
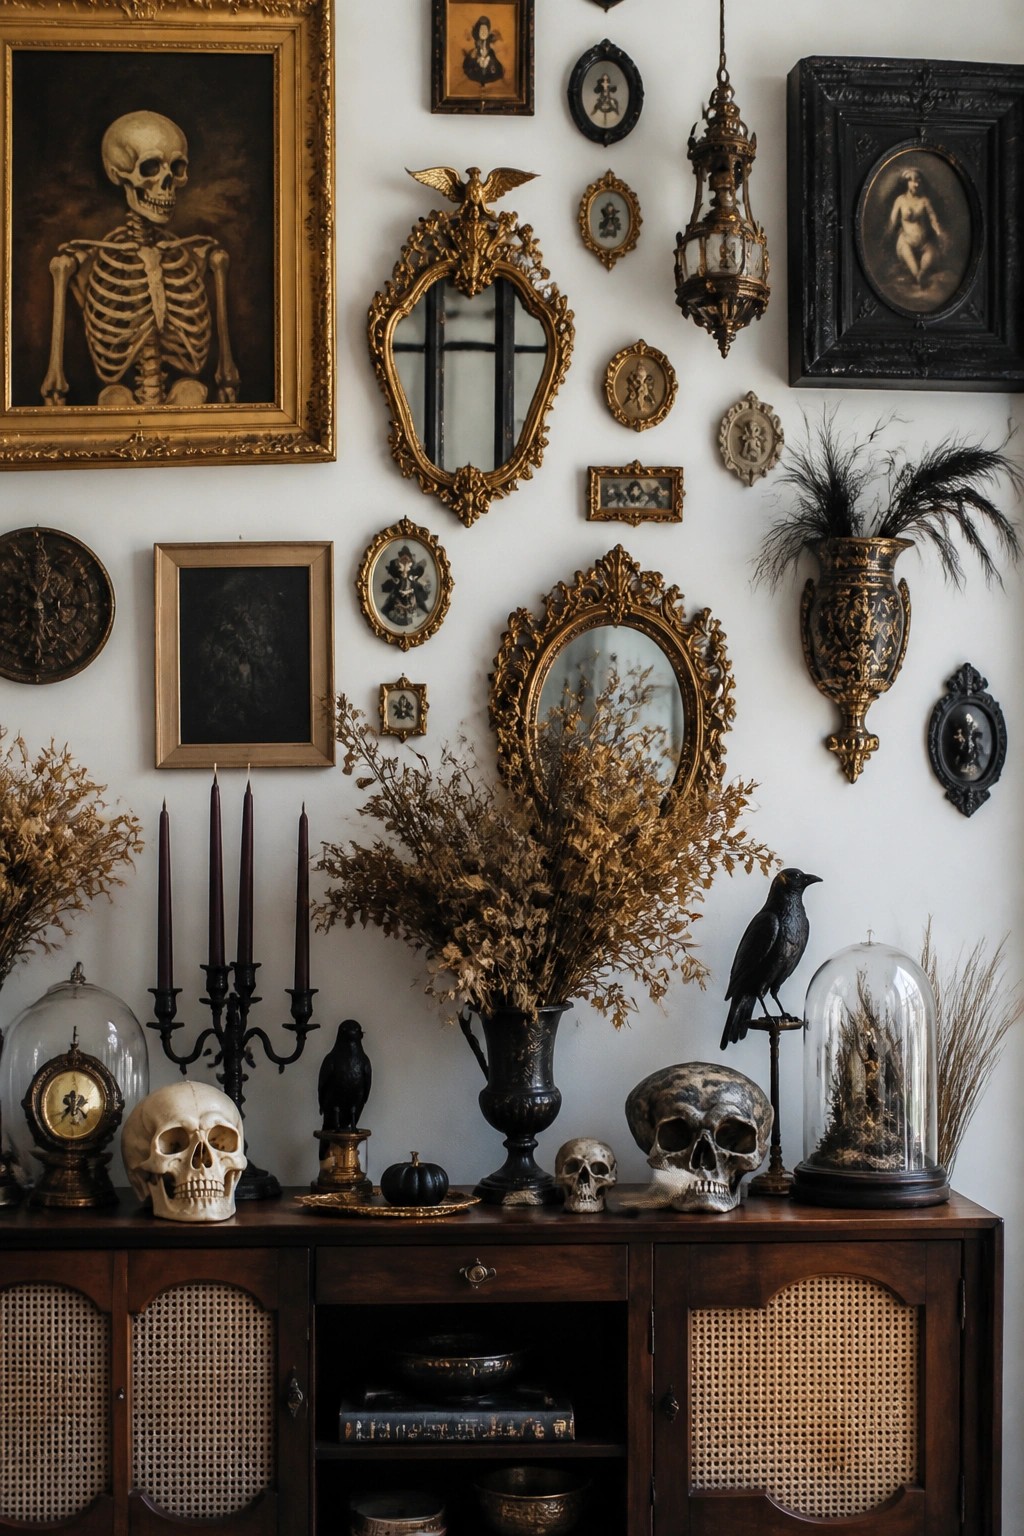
A gallery wall built around skeleton art gives any room an instant Halloween focus without needing bright colors or cartoon motifs. The large framed skeleton painting anchors the arrangement while smaller portraits and mirrors fill in around it. The result feels collected rather than themed.
Start with one strong skeleton piece as the main image. Add a few smaller frames in mixed sizes and finishes to keep the look layered but not crowded. Place a few skulls or a black bird on the surface below to echo the wall art and tie the whole display together.
Arrange Bats Around A Wreath
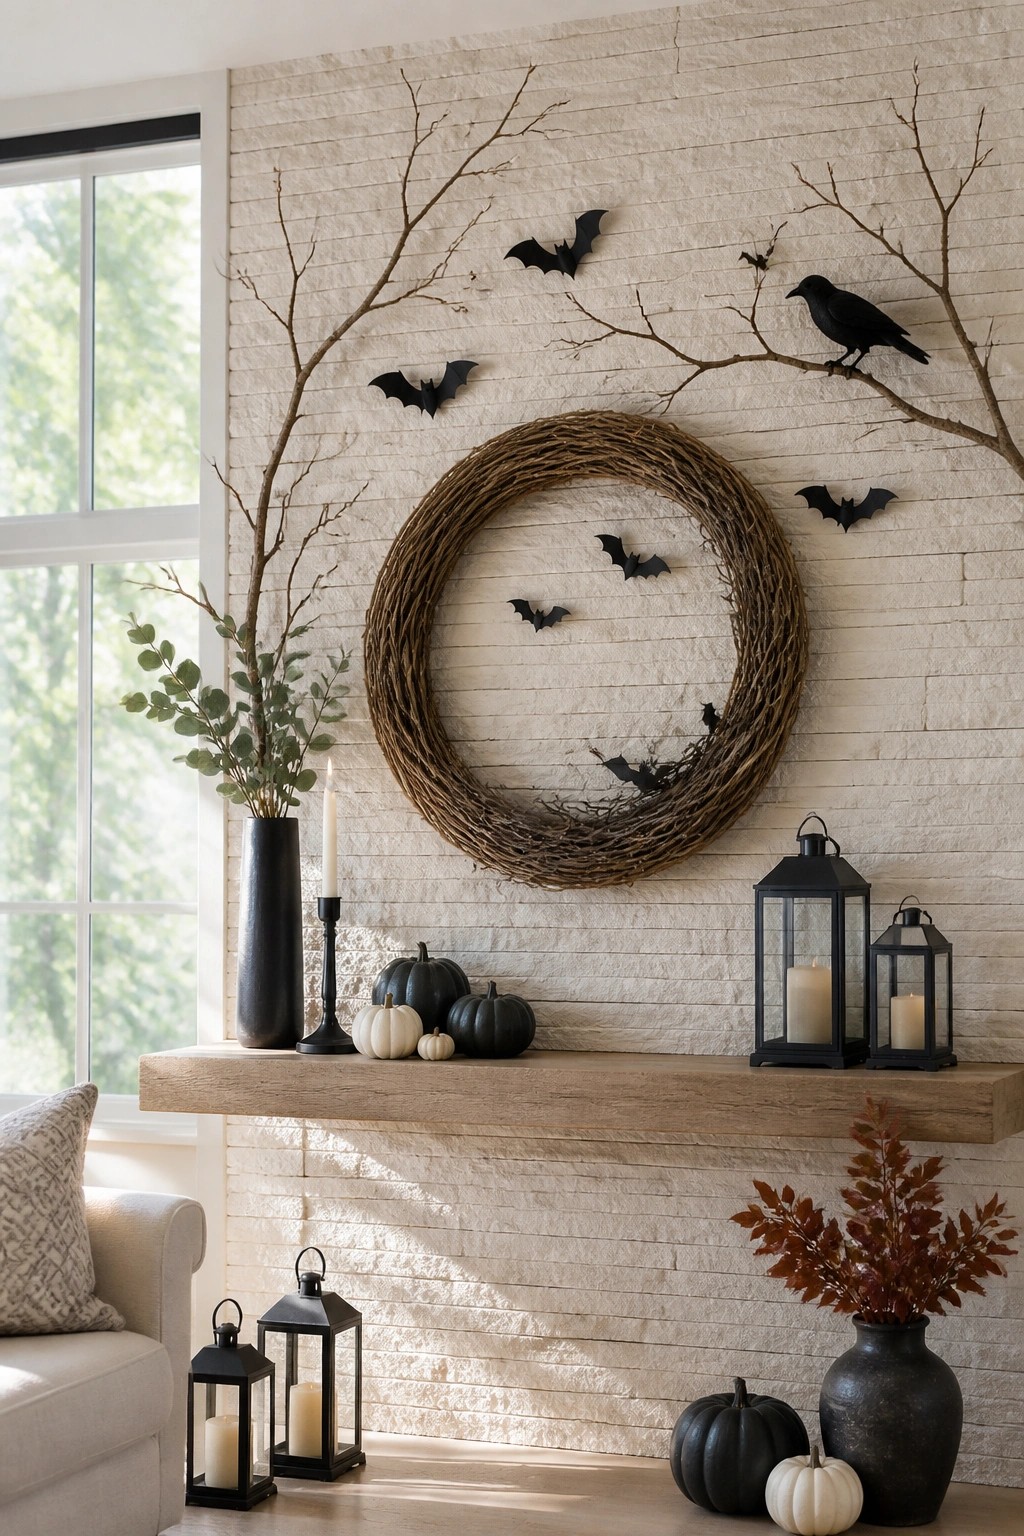
Placing a wreath on the wall and surrounding it with black bats creates a simple but clear Halloween focal point. The wreath acts as the anchor while the bats give the whole setup movement and make the Halloween theme obvious without needing much else.
This works well above a mantel or console where you already have a blank wall. Use five to eight bats in different sizes and angles so they look like they are flying around the wreath. Keep the rest of the surface fairly open so the arrangement stays easy to read.
Frame A Dark Niche With Candles And Lanterns
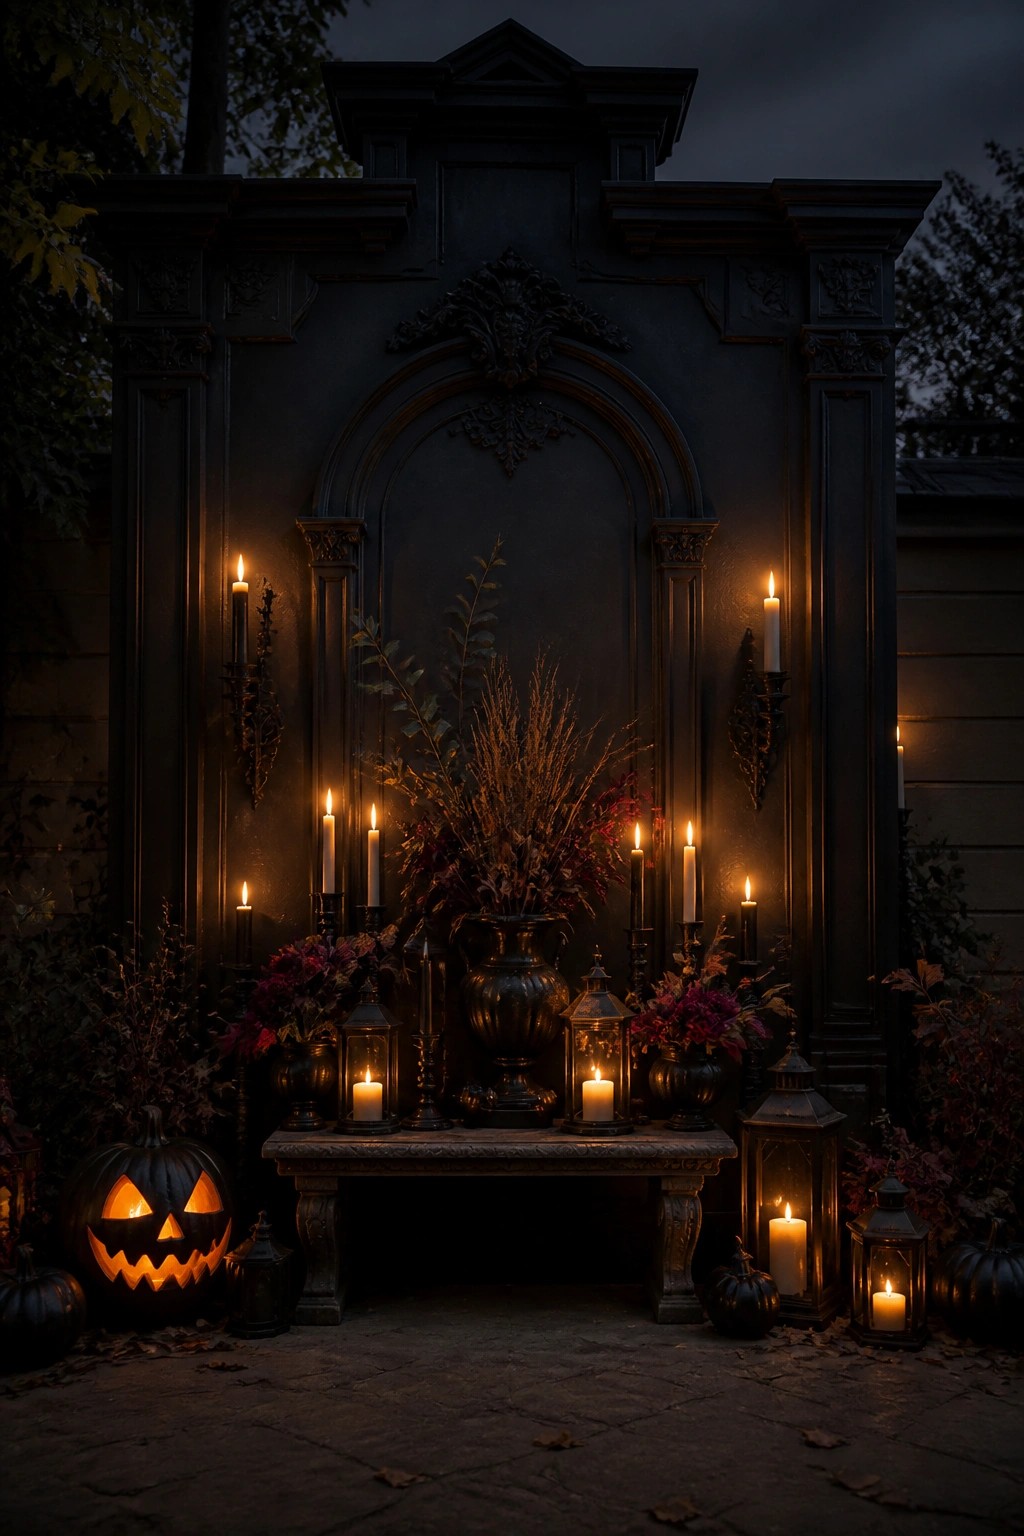
A dark wall niche or outdoor alcove becomes a strong Halloween focal point when filled with candles and lanterns. The glowing lights stand out against the black background and give the space an immediate seasonal feel without needing much else. A carved jack-o’-lantern placed near the base ties the whole display together.
This idea works well on a patio wall, garden structure, or entry alcove. Use a mix of tall candlesticks and a few lanterns at different heights, then add one or two black pumpkins at the bottom. Battery candles keep the setup safe outdoors while still creating the same effect.
Hang A Framed Witch Scene As Wall Art
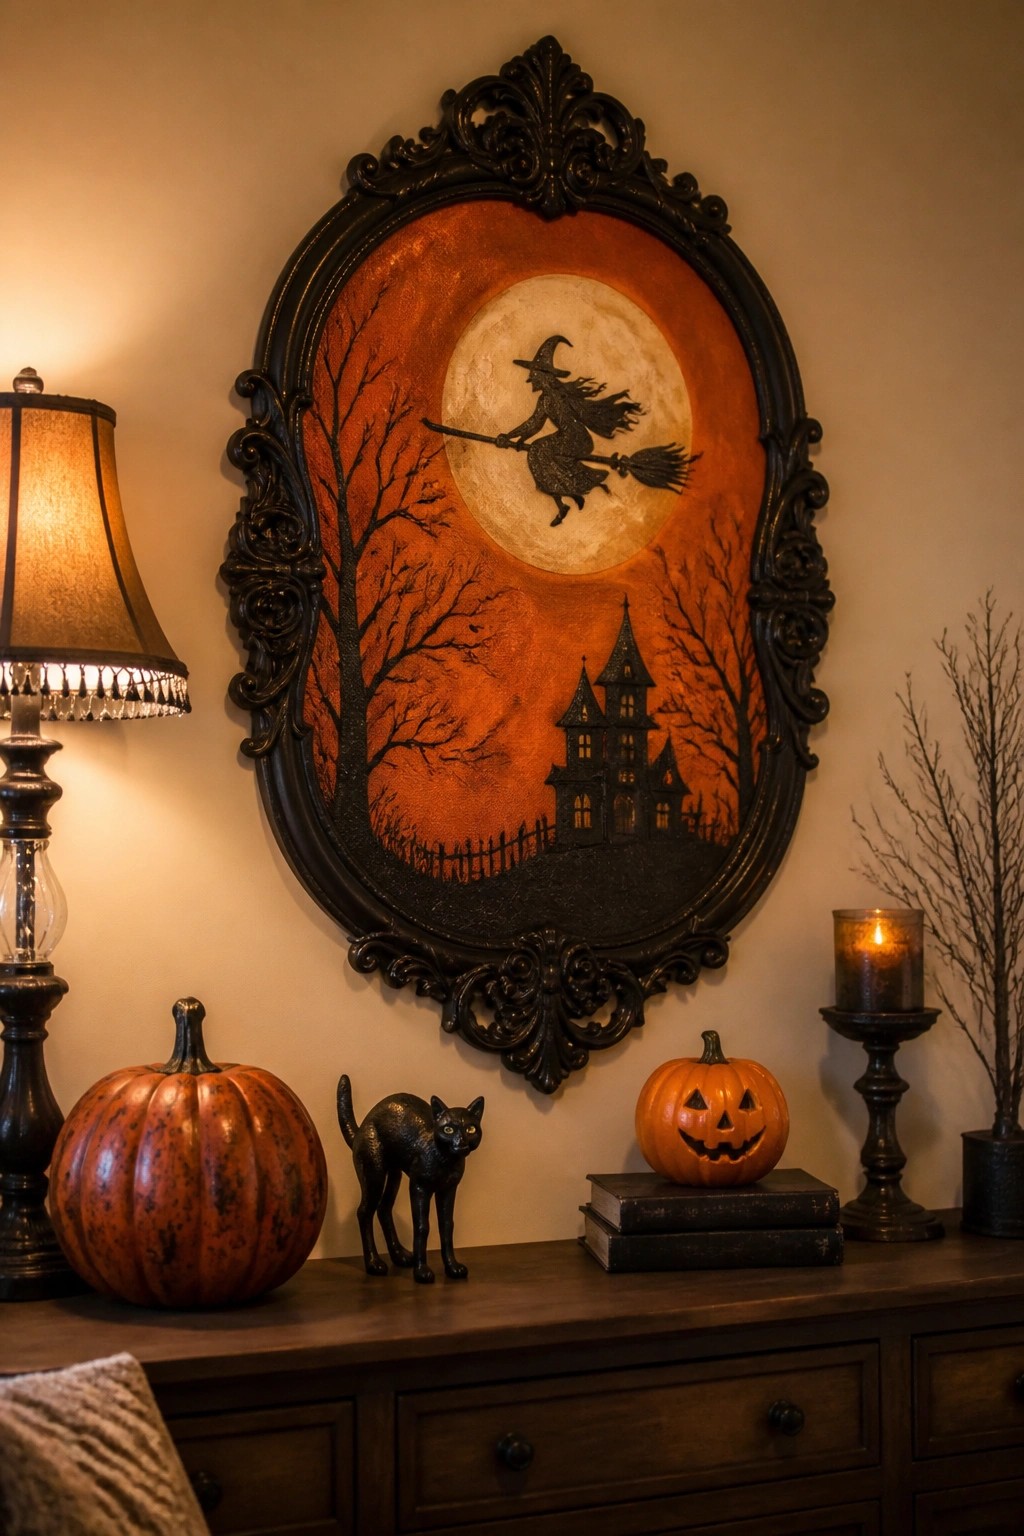
A large framed artwork with a witch silhouette against a glowing moon makes an immediate Halloween statement on the wall. The dark ornate frame and bold orange background keep the piece from blending into everyday decor, while the haunted house and bare trees underneath add extra seasonal detail without extra effort.
This works best over a console or sideboard in an entry or living area. Use just a few tabletop pieces like small pumpkins or a single black cat figure so the framed art stays the clear focal point. One strong piece like this is often enough to shift the whole wall for the season.
Arrange Framed Ghosts And Bats On A Gallery Wall
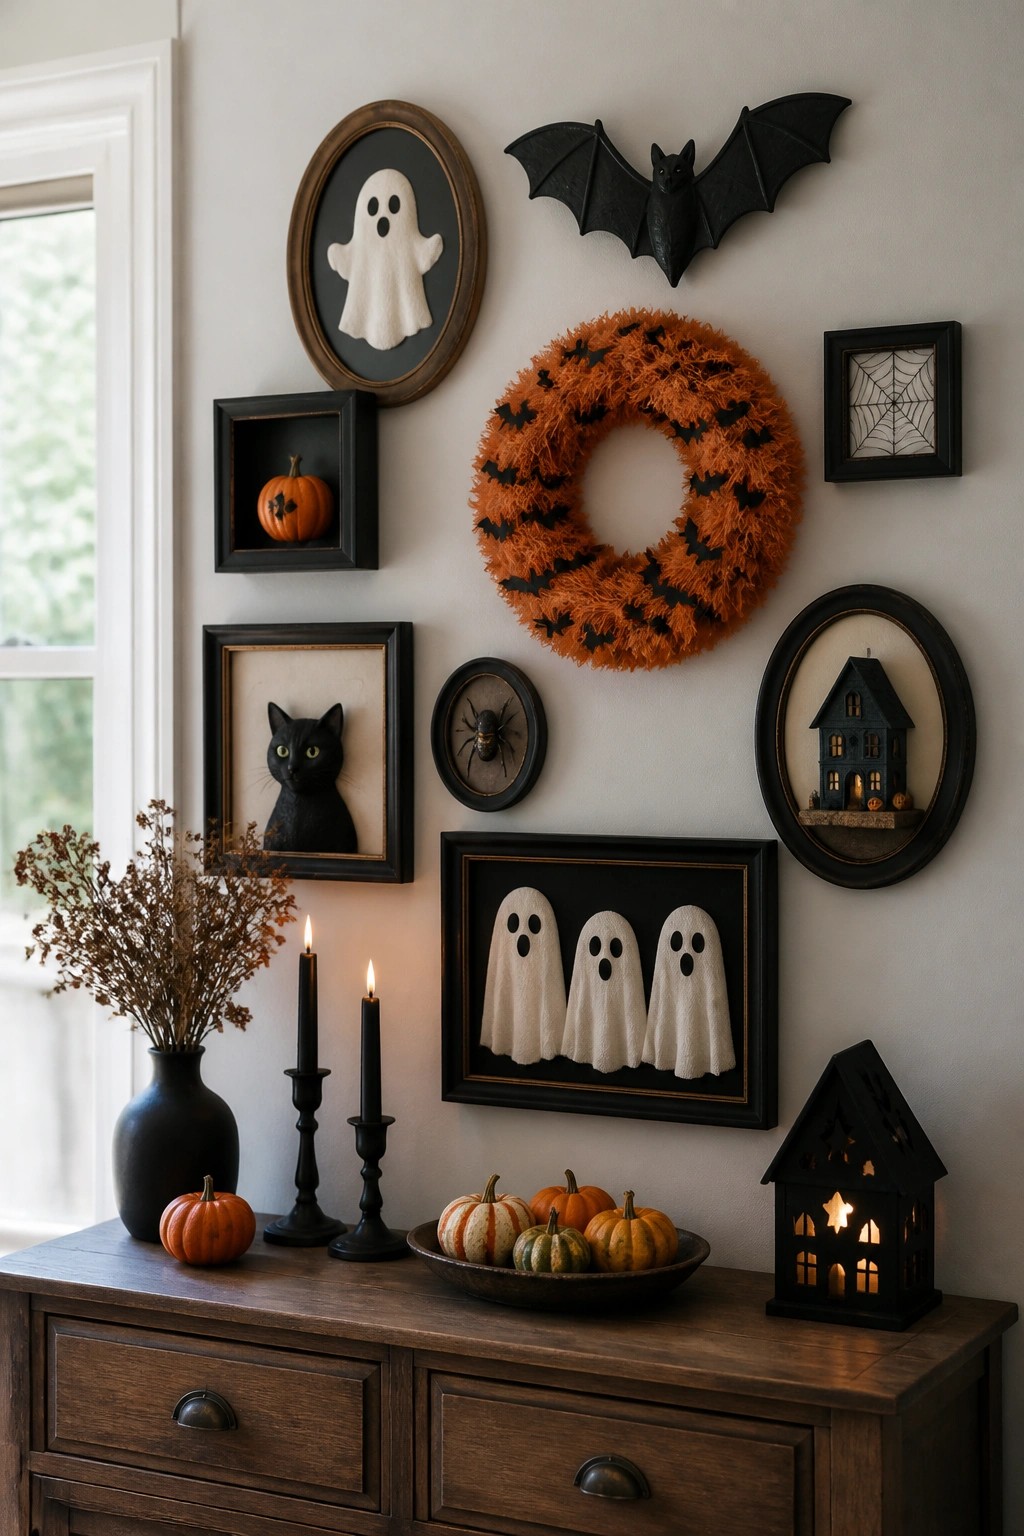
Grouping several framed Halloween pieces on one wall creates a quick focal point that feels intentional. Black frames holding ghost portraits, a black cat print, and a bat-covered wreath pull the eye across the surface while keeping the look cohesive.
This works well above a console or in an entryway. Start with three larger ghost pieces, then add smaller frames like a spider or haunted house to fill gaps without crowding the wall.
Cover The Wall With Flying Bats
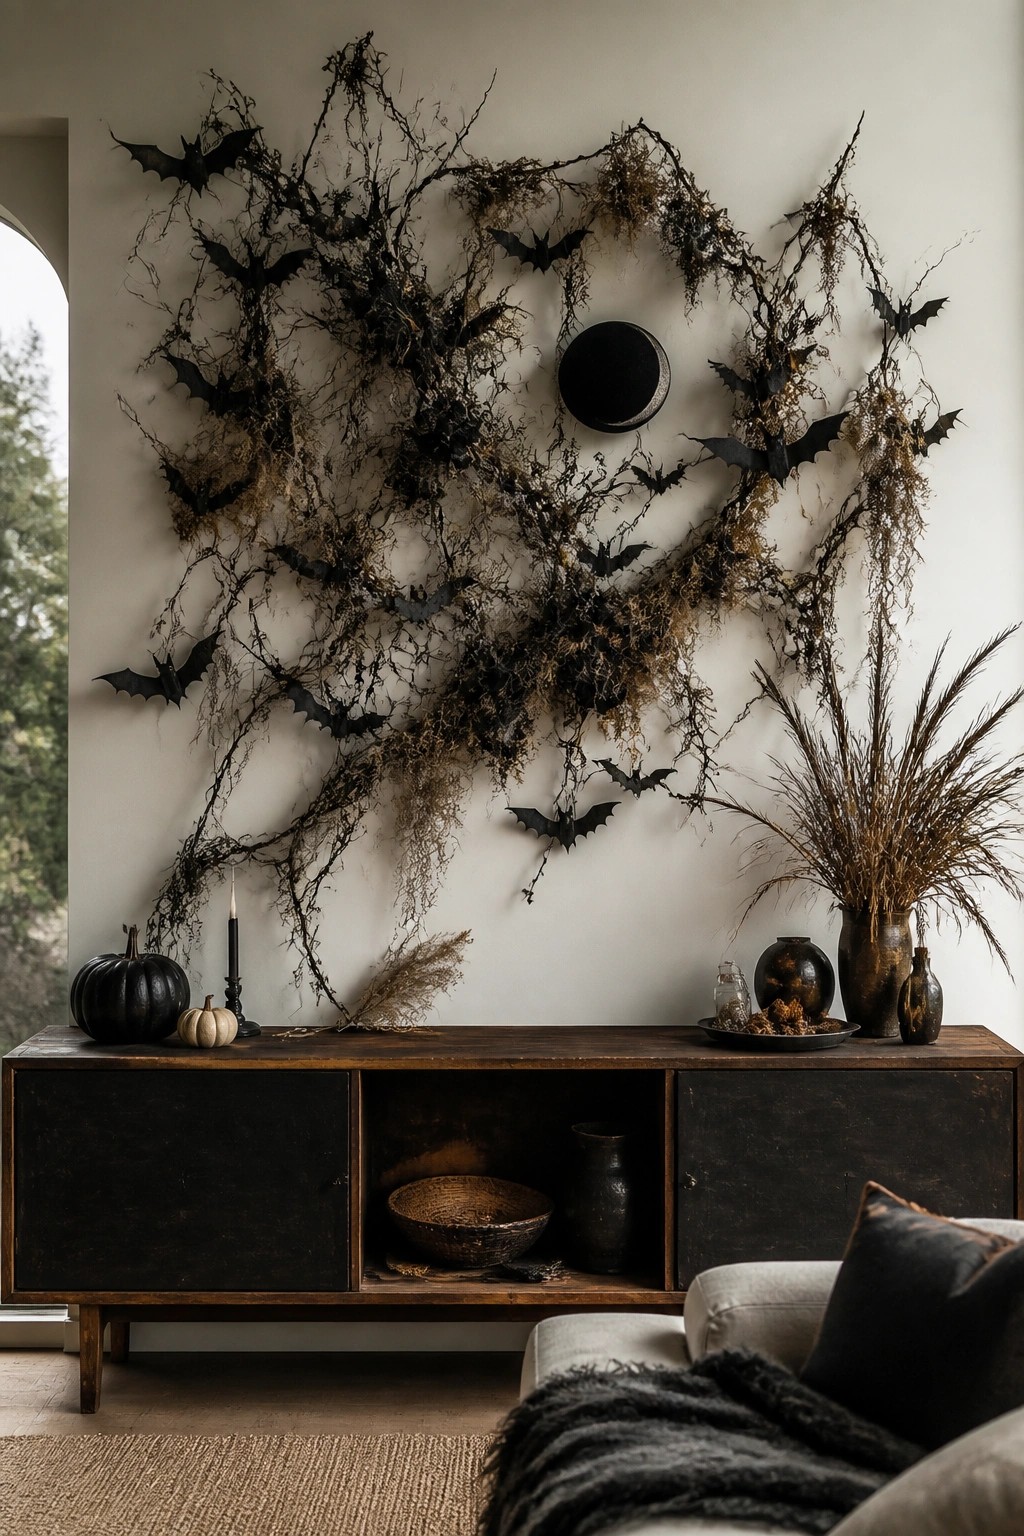
Bats arranged in a loose swirling pattern across one wall create an immediate Halloween focal point. Mixing them with dark branches and twigs gives the display texture and movement so it feels more natural than a flat arrangement. The dark circle in the center works like a moon and helps hold the whole thing together.
This idea works well above a console or sofa where the wall has room to breathe. Use bats in a few different sizes and scatter them unevenly rather than in perfect rows. Add branches last to connect the shapes and keep everything else in the room fairly quiet.
Hang Bats Around A Circular Frame
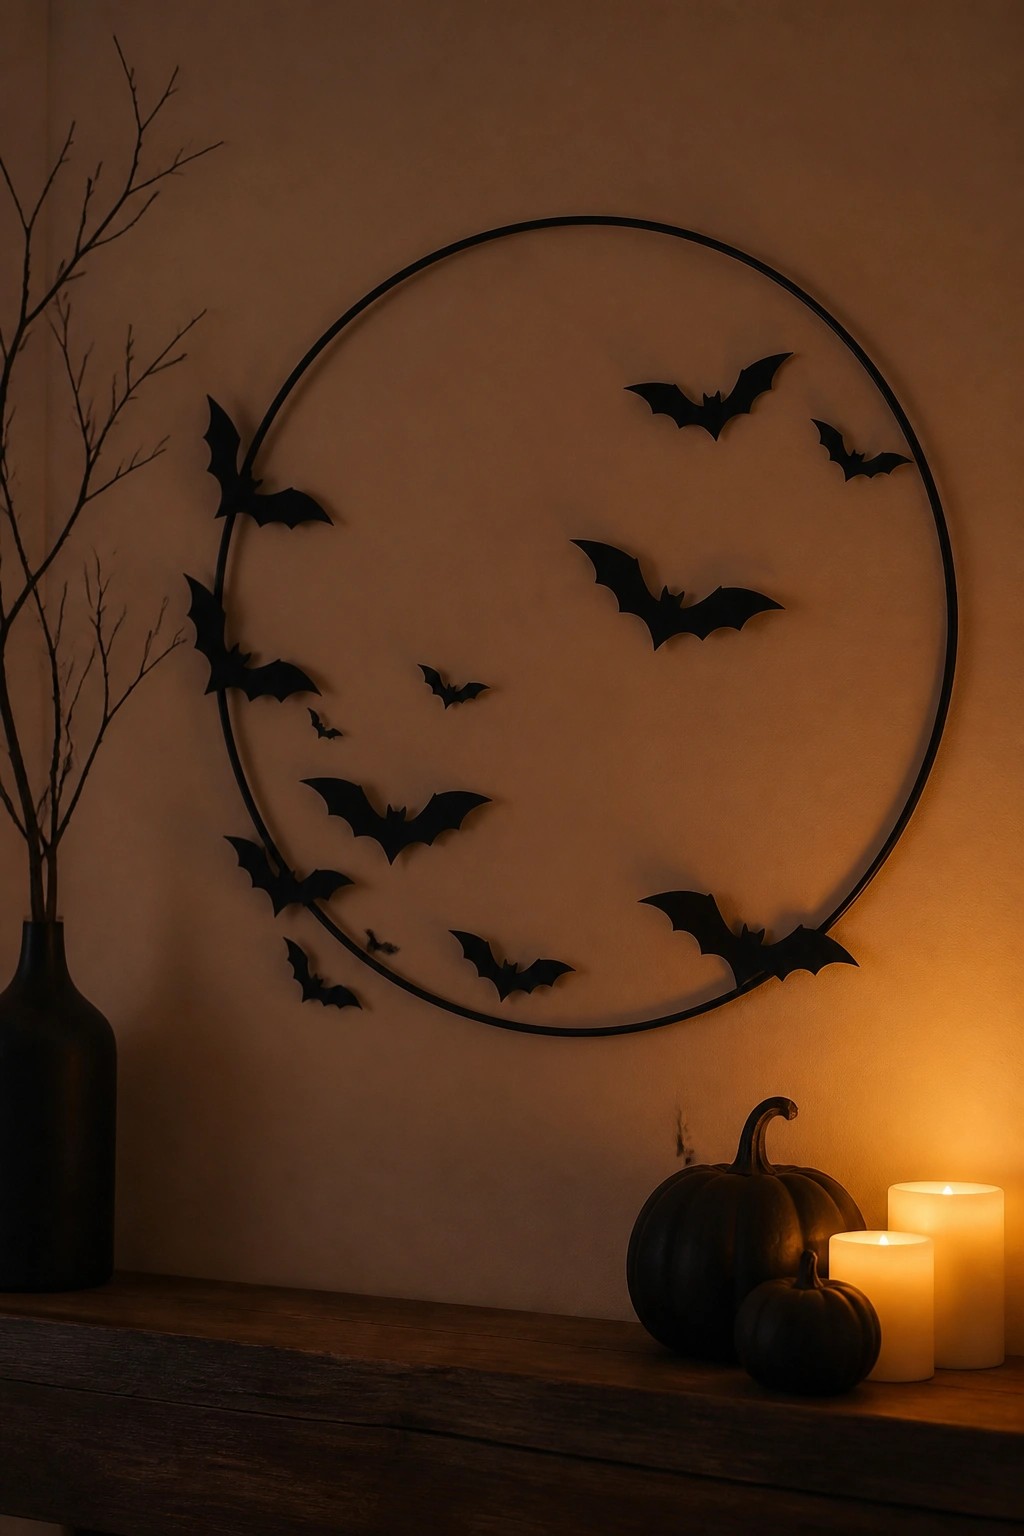
Bats arranged around a simple hoop create a strong Halloween accent on any wall. The repeating shapes stand out without needing much else, and the circle gives the display a clear shape that feels finished.
Place the hoop above a console or mantel and add only a few supporting pieces like small pumpkins. This keeps the focus on the bats while letting the rest of the room stay simple.
Frame A Heart Of Roses On The Wall
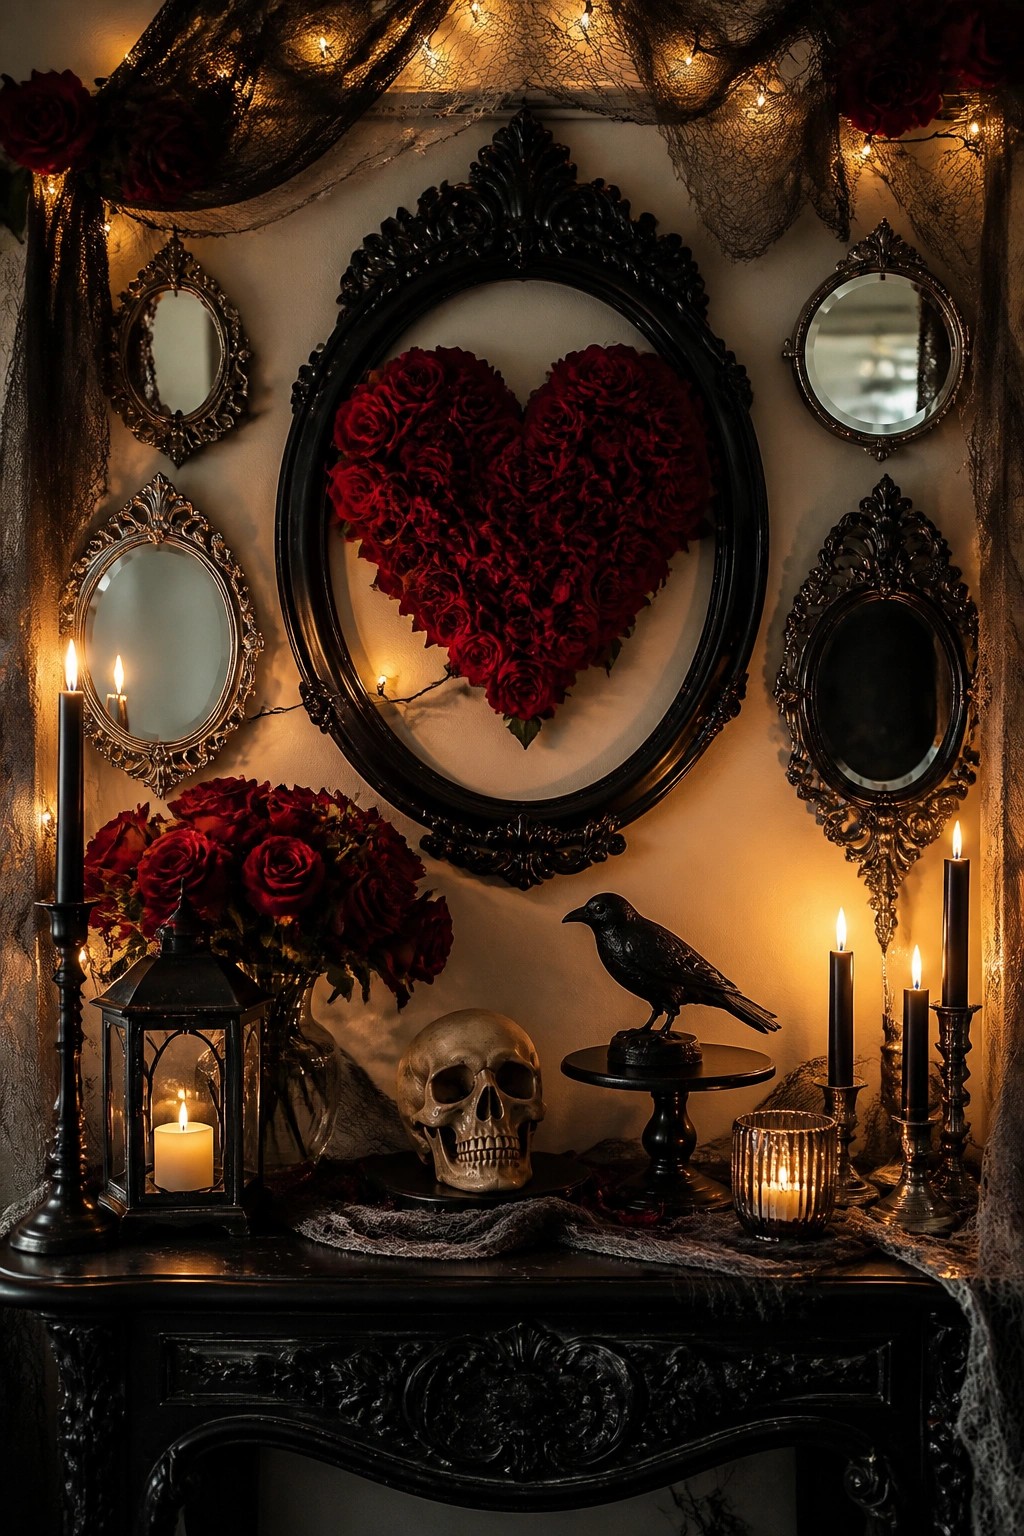
A large black frame filled with red roses arranged into a heart shape makes a strong gothic statement on the wall. The dark ornate frame stands out against a light background and pairs naturally with smaller mirrors around it. This setup reads as Halloween without needing dozens of extra pieces.
To copy the look, pick one oversized frame and pack it with artificial roses in a tight heart formation. Hang it above a mantel or console and keep the rest of the wall simple. Add just a couple of dark accents like a skull or black bird statue below to tie the whole display together.
Frequently Asked Questions
Q: What if I rent and can’t make holes in the walls? A: Stick with adhesive hooks or removable tape for most of these ideas. They hold up well without leaving marks. You can also lean lightweight pieces against the wall instead of hanging them.
Q: How do I keep the decor from falling down after a few days? A: Use good quality command strips or painter’s tape on clean surfaces. Check the weight limit on whatever you pick. Test one piece first before doing the whole setup.
Q: Can I combine two or three of these ideas in one room? A: Pick one main piece and layer a couple smaller accents around it. Stick to matching colors so everything feels connected.
